Grab a cup of coffee… this is a long post!
Did you notice the title? Yes, I moved… my sewing room, that is. I’d been thinking about it, for years really, of how I could make things handier. My sewing room was in our downstairs bedroom, which was also our guest room, so when anybody (namely Jess & Alex) came to stay, it required monumental effort to rearrange and pack away stuff so they could get at the bed have a reasonable amount of room to set their things and move around. Then when they left, I’d have the task of making it into a sewing room again (and trying to remember where I’d stashed stuff to get it out of the way). It was not a good arrangement at the best of times, crowded and always with a bed in the way (although the bed usually held a lot of fabric, so there was that) and a NordicTrack skier that I use regularly. It could be tricky just getting from the sewing machine to the ironing board.
I thought of getting a futon or something to replace the bed. That way it would be folded up and out of the way in between visits. But that still would make for a lot of moving stuff around for visits. My other thought had been to get rid of the twin bed in the third bedroom upstairs and make that into my sewing room. No one ever used that bed anymore; it served more for holding fabric, as the room contained most of my fabrics… and other stuff that was just stored in there. The question was, was the room big enough to hold everything I needed it to? I wanted to add a cutting table so that I’d no longer have to use our dining table and put whatever I was working on away every time we needed to eat.
I was discussing this with Jess one day before Christmas, and she said Alex, being the engineer, loved to arrange rooms, and she volunteered his help. He arrived last Christmas armed with graph paper and ready to get to work. He drew out the room to scale, and then he and Jess made to-scale drawings of everything on my list that I had made of sewing room essentials and their measurements. Here’s the tentative room with its arrangement:
It looked like everything would fit! So….. was I brave enough to go through with it? It was now or never, while I had the help of the whole family being together for Christmas. I decided to go for it! Everyone got to work and emptied out the room entirely, including the closet. It all went into the living room. Yikes!!
I had already purchased the cutting table I wanted from Amazon. Courtney was Grandpa’s assistant in putting it together. I think she made sure he followed the directions. 😉
I can’t quite tell if she was having fun here or not. It was quite a task, but they got the job done!
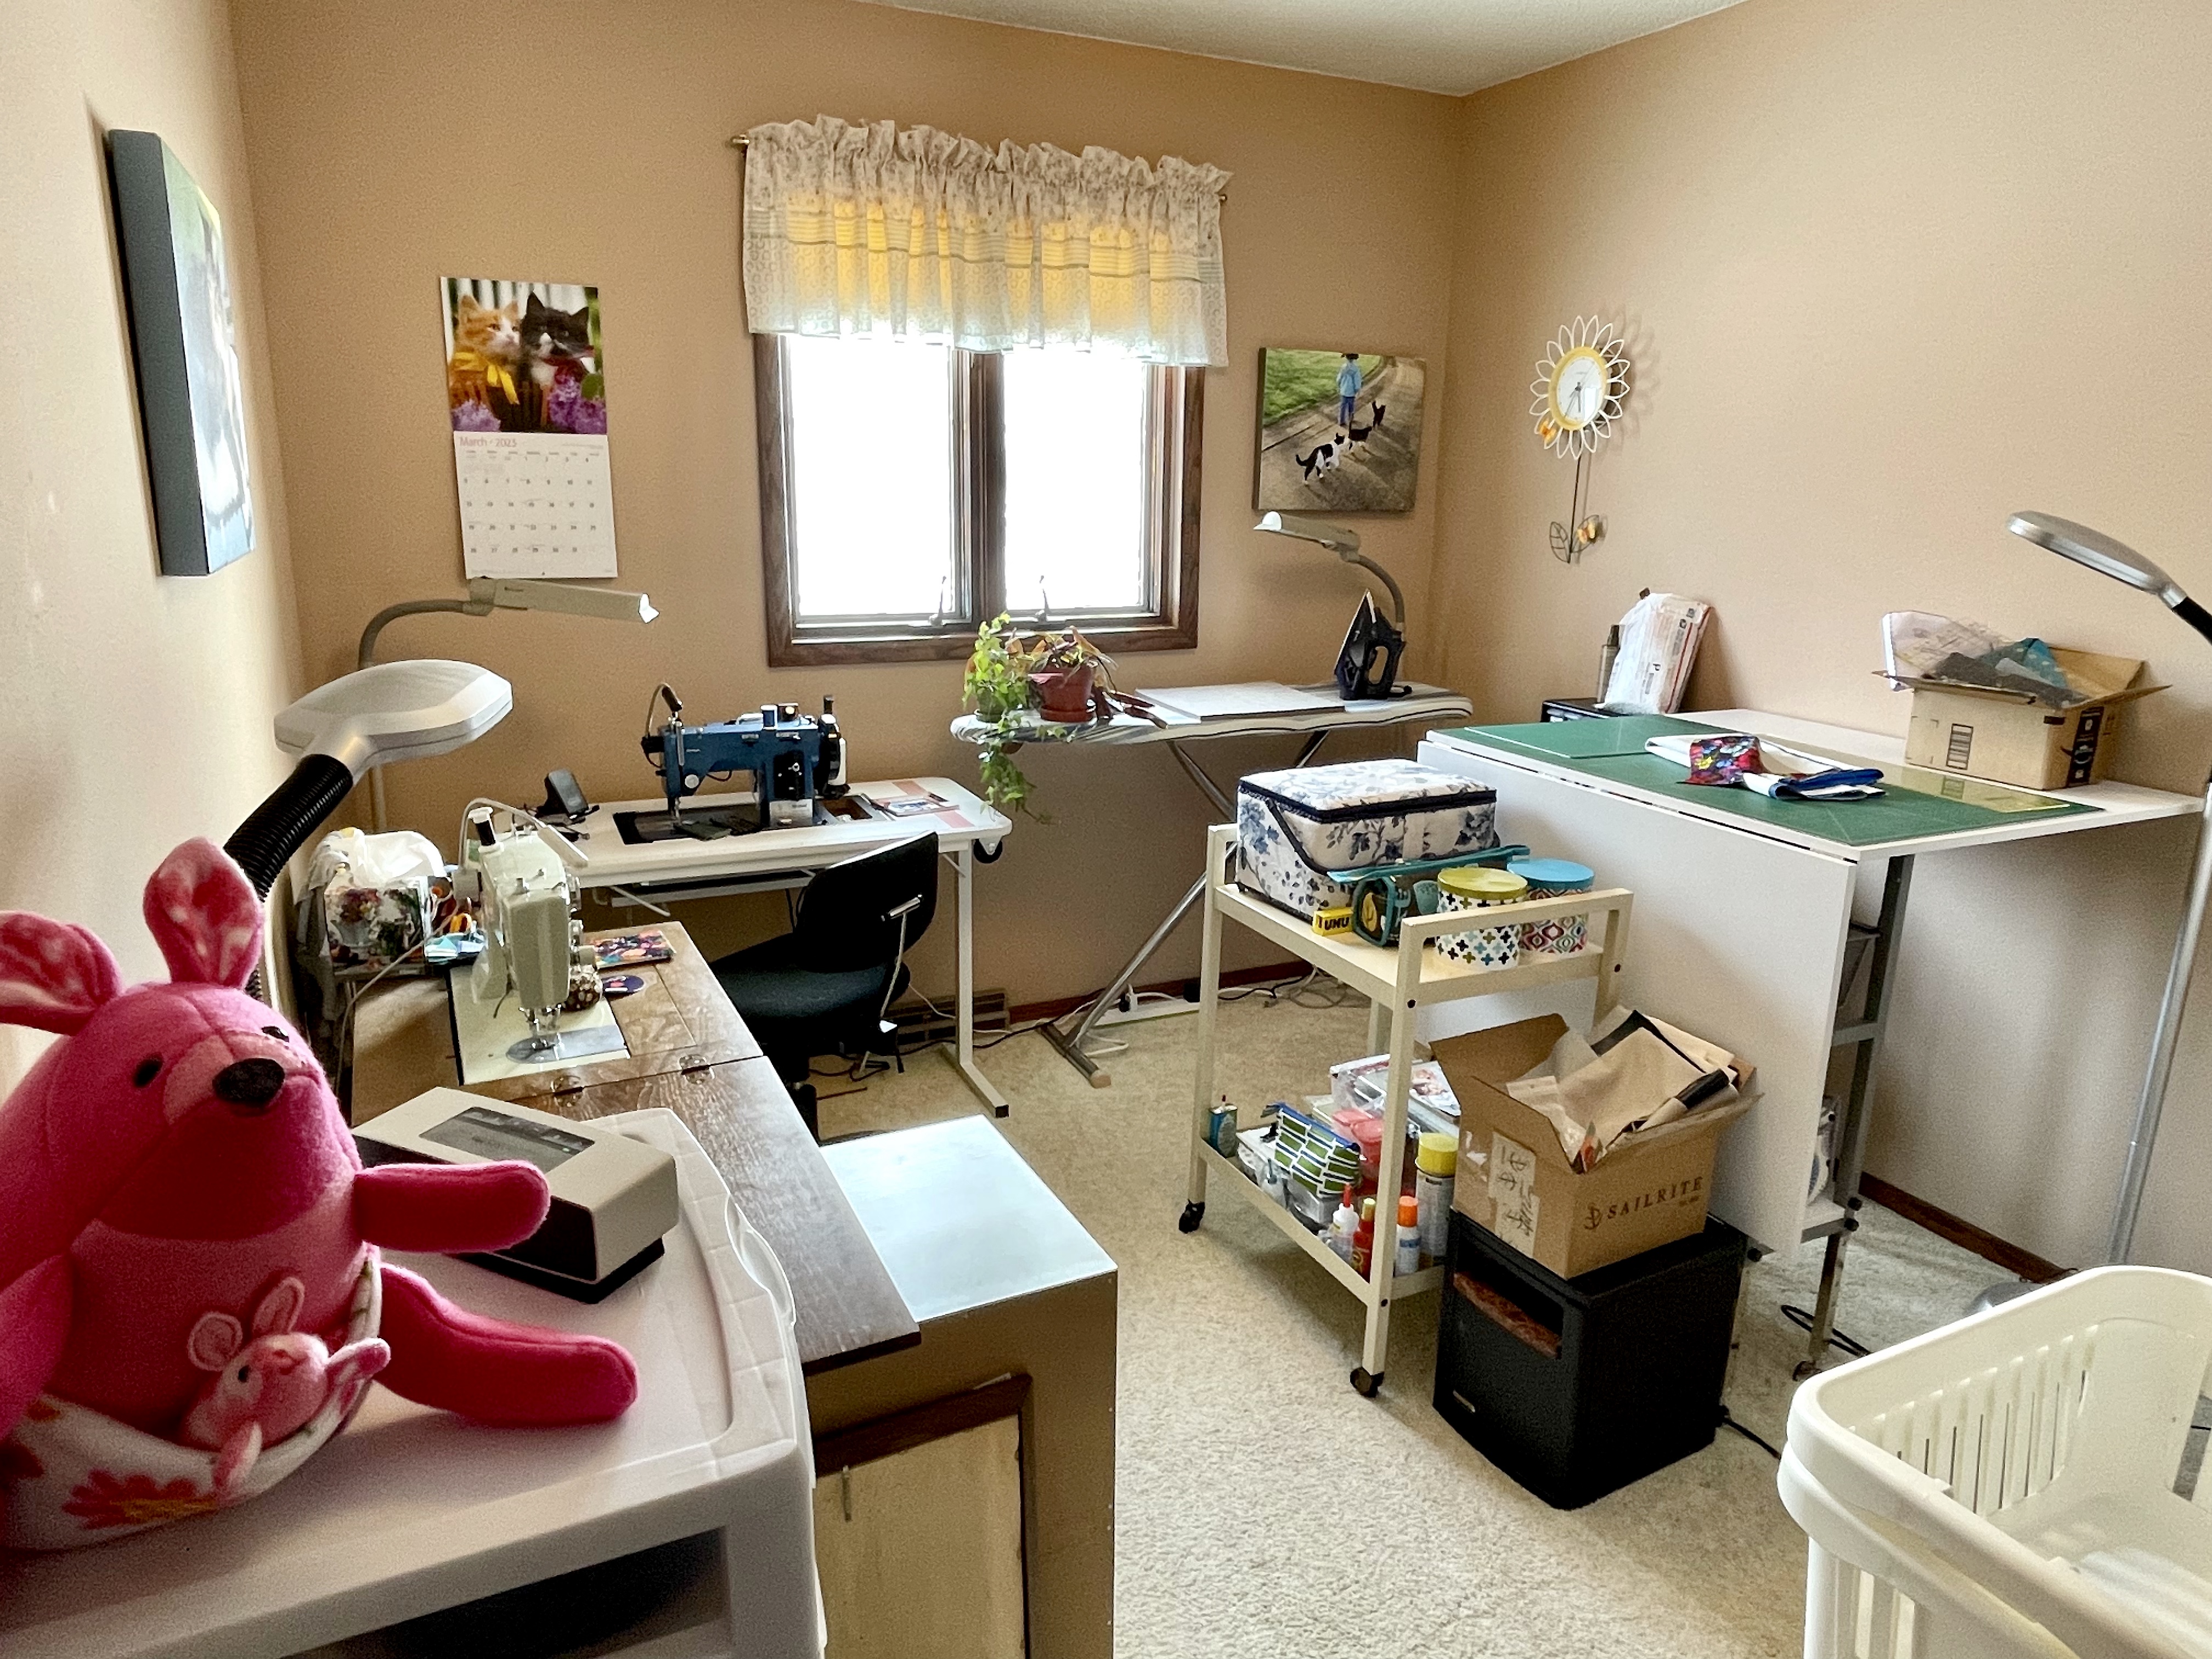
The rest of us got to work moving stuff up from the basement and putting it into its new home. I rearranged some of pieces of the original plan, but at least I knew it was all going to fit somehow. Long story short, here is what it looks like after everything was completed. I took this photo a couple weeks ago, and I’d been doing some sewing, so it’s got extra ‘stuff’ in there. But I figured I’d better take some pics before it got worse. Nothing stays neat very long. If you’re a sewer or a crafter, you know, right?
Now I’ll give you a closer look at some things. You can see the cutting table above. One half of it is folded down, but that extra half can easily be folded out to double its size. It should be sufficient for the bigger projects (and I have some lined up to give it a good test). Underneath that folded part are a shelf and a couple of hanging baskets for storage. Very handy!
Against the one wall is my 52-year-old ever-faithful Kenmore. Above it hangs a photo-on-canvas of my favorite housecat ever, Willow.
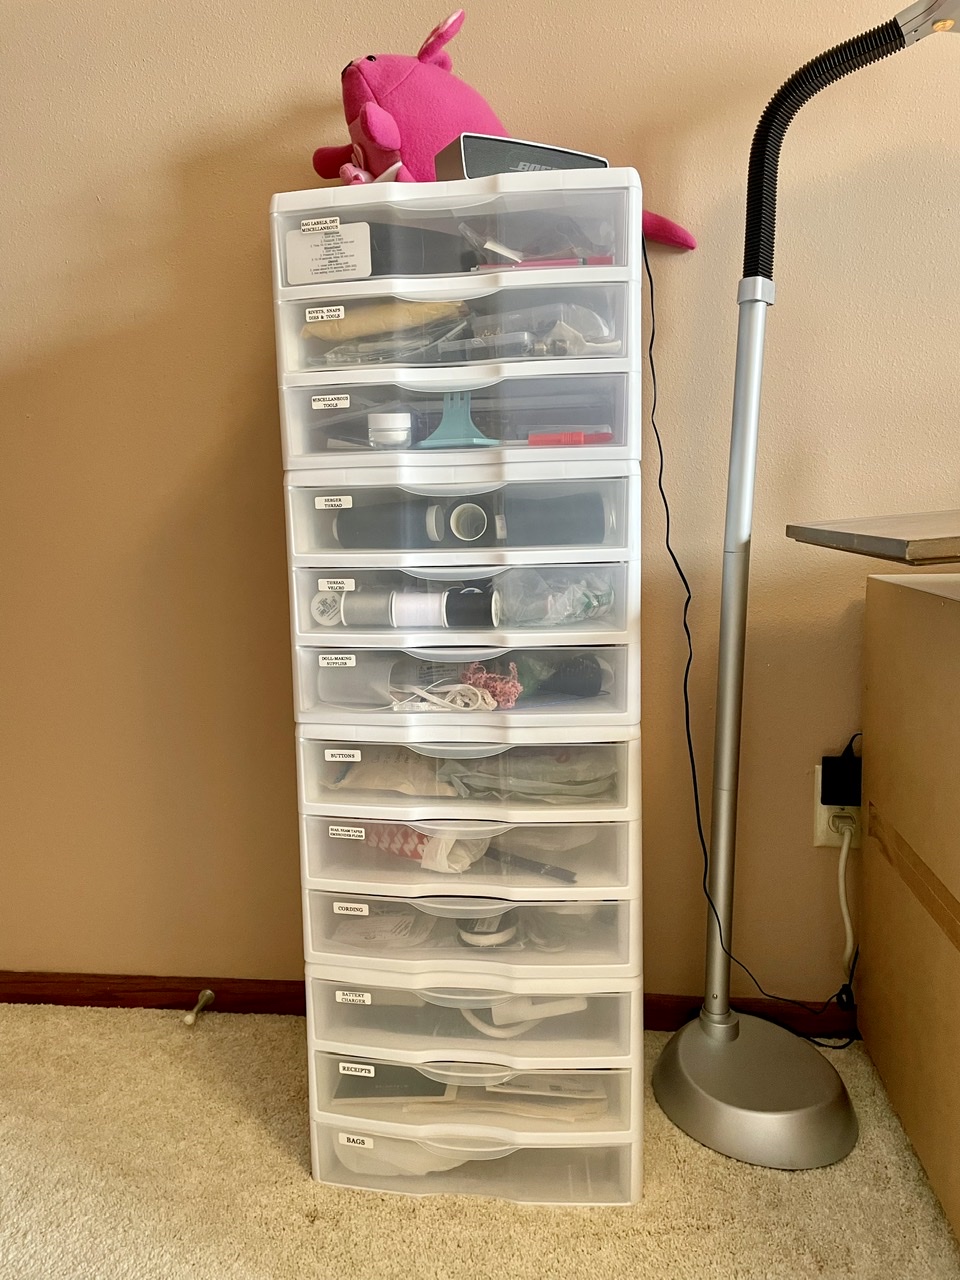
To the left of the Kenmore is a stack of drawers that hold all kinds of miscellaneous but very necessary items, each drawer with a label that I’d made some time ago. On top are a speaker that I bluetooth with my iPad or phone… and a hot pink
kangaroo that I made a few years ago.

Below the fold-out arm of the Kenmore cabinet is a new cabinet that I bought to hold my serger. When I need to sew with that, I can roll the cabinet out and set the serger on top. It’s also the perfect height for my rivet/snap press, since that requires some leverage on the handle. I bought this cabinet from Amazon also. I started putting it together myself when Grandpa was away. I had it all figured out and could’ve finished it, but with all the screws that needed to go in, I knew it would take forever. So I called my son and he came with an impact driver, and saved me a whole lot of work! I think it turned out great and will do its job nicely. It sticks out into the room a bit, but it’s not a problem to go around it. We’ll see, though, how it works when the cutting table is fully opened.

This stool holds lots of tools in the
Honeycomb Basket I made a few years ago. On the bottom step are bobbin cases, and below that on the floor are a couple of cases full of various colored threads. That colorful coaster next to the Kenmore was handcrafted and gifted to me by Courtney. 💕
The little rolling cart below used to belong to my grandmother. It holds my sewing basket and lots of various ‘stuff’. It’s nice that it’s on wheels because I can just grab it and move it to wherever I need it.
Behind that cart, against the wall and next to the cutting table is a cabinet full of little drawers that hold all my bag hardware in various sizes. I made labels for all those drawers, too, as well as sorted and organized all those little bits to make them more convenient to find. That was a task in itself, but I’d done that a year or more ago.
Below you can see a cabinet which gets used to store a lot of household stuff that seems to have no other place to go. On top is my crockpot. And two
chickens. My clothes baskets reside in the room, too, for lack of a better location for now. The closet contains Christmas decorations, among other things, some of which are bags I’ve made that I don’t know what to do with.
My ironing board has a nice bright spot by the windows, so lots of good light for ironing and to brighten the room. It’s also good for my only two houseplants which had been in this room all along and I don’t seem to have a better place for. I know an ironing board isn’t an ideal spot, but they’re not too difficult to move around to other temporary spots. They do love the light there. I just don’t want them out where the cat can get at them. She is not allowed in this room.
On another wall is a second photo-on-canvas, and it’s a favorite. That’s little Courtney walking along our driveway with some companions.
I guess I must like cats. I have a kitten calendar on one wall, too. 🐈
I also have a clock in my sewing room. Mainly it’s for the cuteness factor. It’s battery-operated, and it gets stuck a lot, so it rarely has the correct time. 😑
NOW… if you’ve been very observant, you may have noticed this in one of the other photos:
It is not my Kenmore. It’s newly acquired, as of December! I’ll save the details of that for another post. Soon, I promise! This one is too long as it is. But I hope you’ve enjoyed getting a glimpse into my sewing space. I am thoroughly enjoying it! I love having it upstairs, and although it’s close quarters, it’s not inconvenient. Everything is very handy! I love it!
My fabrics are now in the basement bedroom. Presently they’re awaiting sorting and storage. I’m much better at procrastinating than I am at organizing. 😣 At least once I get done, they won’t have to be moved every time Jess and Alex come. The living room is emptied of its excess except for about three boxes of things that I have to clean out a place for. It’s all a never-ending process!