Thursday, January 28, 2016

Lorelei and Alanna

Okay, I know I said I was going to try to do better at blogging in January. Well, just so you know, this post makes one more than the number I did in December. Ha! Still bad. But I can't blog and sew at the same time, and I've been sewing. Here's what I've been working on.

This is the Lorelei Bag in one of Jess's barkcloth designs from her new collection In Theory. The fabric is supposed to be released... well... soon... from Cloud9 Fabrics. And by now we all know "soon" is relative. ;) So we'll wait and see. (We did get the sample fabrics sooner than expected!)


That's a zipper pocket with pleather and rivets for trim.

Inside is another zipper pocket on one side and a large divided slip pocket trimmed with outer fabric on the other side. It fastens with a magnetic snap.


It's a big bag! My hair dresser graciously agreed to model it for me to give you an idea of how big it is.


The pattern came as a set of two bags, and here is the other, the Alanna Zipper Pouch. It has the detailed outside pocket to match the Lorelei Bag.


The straps and the pieces that surround the zippers are pleather, as is the zipper pull (that I just made up to go with the rest). Here are Lorelei and Alanna together.


The patterns are by ithinksew. I'm not going to link to them for you because I just can't recommend them. The instructions were skimpy, so bag-making experience was certainly necessary, but even aside from that, there were a number of issues that just made for a lousy pattern in my opinion. It was apparently not tested, because one of the steps was simply impossible to do. Ugh. And although the pictures showed a snap, there was no mention of installing it! For some reason, I expect a pattern to be accurate.

In the making of these bags, I relied heavily on tried and true methods. I used my favorite tutorial for the zippered pockets, and I followed the wonderfully clear and detailed instructions for the Essential Wristlet by Erin (Erickson) Gilbey for constructing the zipper pouch itself.

Since I was going back and forth between patterns, I managed to forget a step. The pouch was supposed to have a strip of the pleather across the top front and back, like this, which I had cut and ready, but....


It would've been cuter with that trim on there, but as it turned out, I'm glad I forgot it, because those strips would've made for very bulky seams at the corners.

The pattern called for sewing the pouch and lining together, then binding the seams on the inside with bias seam binding. Umm... I like Erin's method much better, with the seams ending up between the exterior and lining fabrics.

Incidentally, the zippered pockets are very small. They are about 5" wide by 3" deep. They're probably only good for car keys, chapsticks, etc. You'd have to have a very small cell phone to fit it in them.

I'm very pleased with how the bags turned out, even if it was a frustrating process. If you REALLY love them and decide to make your own, you can email me for details on how to work around the not-so-great pattern. By the way, I checked the pattern reviews for this seller. For the most part, they said things like "This pattern looks great - I can't wait to make it!" Not exactly a helpful review, is it? There was one, though, that said it all: "I got so confused I gave up." Now that's a more realistic review.

I'm off now to start another project, and this one I know will go well, because it's from a tested and much loved pattern by Erin, but one I haven't made before. I'll be showing you later......

Friday, January 15, 2016

Just so you know...

Even though I've been lousy at blogging, I've not been sitting idly twiddling my thumbs. Jess received her yardage of her new In Theory barkcloth on Monday, which means it'll be available in stores very soon, which means I need to get some sample projects made up!

Isn't it gorgeous? I just love it!


So I AM busy. Here's proof... a project in the works.


It's making progress.


Jess even sewed up a little project of her own with it! This is the Meridian print, which just happens to be my favorite, although surprisingly, I like it in the other colorway even better.


So there ya have what's been going on around here. I'll surely show you things when I get them finished. At least the weather's good for sewing, if not much else. We're supposed to get near 20°F below zero this weekend. Aargh.

Monday, January 11, 2016

What to do when it's below zero outside

What do YOU like to do when the daytime temp is below zero °F? Here in our house, we sometimes like to just hang out in a spot of sunshine.


More often than that, we take naps in that sunshine.


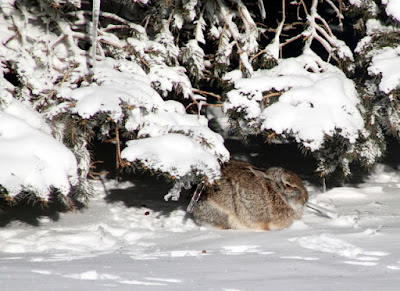
For those that live outside, naps in the sunshine are a little different.


But sometimes they like to play, too.


Above you can see why cottontail rabbits are so-named. :)

Saturday, January 9, 2016

Just had to show you

I was headed out to feed the cats in the -5° (-26° wind chill) weather this evening, but just couldn't resist running back to the house and tracking snow across the kitchen to get the iPad. Here's the amazing sunset I saw. This photo doesn't begin to do it justice.


Tuesday, January 5, 2016

From the sewing factory - Luggage Tags

We had somewhat of an assembly line going in our "sewing factory" over Christmas. Jess and Grandpa were working on the cutting end of the line (Alex was cooking), while I did the sewing. We made luggage tags (good guess, Jenny!). 


The "Just the Ticket Luggage Tag" pattern was designed by UniquelyMichelle, who besides patterns also has some lovely bags in her Etsy shop. The luggage tag pattern can be found here.


I was very happy that I happened to have on hand colored snaps that worked well with the Typography fabrics.

It was a great pattern. She used actual photos (which I prefer) and detailed instructions that made it very easy to follow. The only little discrepancy I found was that the pattern said to cut the straps from the coordinating fabric, but all of the photo examples showed the straps matching the main fabrics. :) Just something to note when cutting out the first time, although it's not a big deal, because you can choose to make your straps from whichever fabric you want.

The coordinating fabric makes the flap that covers a vinyl ID window, and also the backing behind that window. The flap snaps shut so your information is hidden from nosy eyes.


Front and back of different tags.


Here is what all our tag insides look like.


Jess even designed an ID card to slip into each one!


Below is one of the tags "in action".


I liked Michelle's suggestions in the pattern of using the tags for enclosing a gift card or even some cash for someone. There are lots of possibilities for uses besides uniquely identifying your luggage.

These tags were very fun to make. You could use any combination of fabrics, and they make great scrap-busters! I would only offer one word of caution... making them can be addictive! They go together fast, and the more you make, the faster they go... you might not want to stop! :)

Thanks, Michelle, for a very fun project!

Update: Jess is offering the PDF file for her printable ID card if you'd like one to go in your luggage tags. You can get it here.

Monday, January 4, 2016

Jess sewed!

Jess has a sewing machine. Once in a great while she'll pull it out and make something with it, although she always manages to "sweet-talk" me into into making the big projects when the time comes. She did get her machine out a couple days ago, and I thought what she made was just so darn cute that I had to blog about it, since she no longer posts on her own blog. 

Look!


Both are made from her Typography fabrics, and she used a tutorial that she found here. Aren't they just fabulous?!

Her hubby, Alex, was the stunning model, and because he believes that a real man knows how to tie his own bow tie, he studied a video to learn how. Whatta guy, huh?

Those pics just make me smile every time I look at them. Hope you like 'em. I have it on good authority that Jess sewed something else, too, and maybe I can convince her to let me show you (after she shows me). But first I have to show you what else we worked on over Christmas. I finished them yesterday, but have to take photos yet. Check back tomorrow and see.....