Sunday, December 5, 2021

Eli Laptop Case

The latest pattern from Linds Handmade Designs is the Eli Laptop Case, and I once again tested for her. The pattern is for a zip-around case, and it can be adjusted to fit nearly any laptop or even a smaller device. Since I don‘t have a laptop myself, I made a case for my iPad.


Below what it looks like inside. It has corner anchors to help hold it in place. If making it for a laptop, it would also have elastic at the other corners.


I made the spine from a scrap of cork fabric. The pattern calls for webbing for the handle, but since I didn’t have any the right size on hand, I used cork scraps there, too. Getting down to the last few inches of my cork, I had to splice the handle, as you can see.


Using cork there made it too thick to turn under the ends, so I just did one layer and edge painted the raw edges. I also repositioned the handle a little, due to the smaller size of the iPad.


The fabric I used for the exterior is waterproof canvas, and the lining is a chambray(?) fabric scrap left from another project. The case is padded with fusible foam.

You can use measurements with a ruler and rotary cutter for your pieces, or if you’re not into doing the math calculations, there are pattern pieces and a brilliant way to get them the perfect size without having to do math at all! 

The pattern is at a discount price through tonight (12-5-21), so if you’re interested, grab it now. You can find the pattern here.

This is probably it from me until next year, so here’s wishing you all a wonderful Christmas! ❤️


Friday, October 8, 2021

Stephie Shoulder Bag

Linds Handmade Designs has been at it again! I just tested another terrific new pattern, the Stephie Shoulder Bag. Here's my version, made from one of Jess's (aka How About Orange) barkcloth designs for the outer main fabric, faux leather strap and accents, and waterproof canvas for the lining.


The back has slip pocket perfectly sized for your phone. (If you've followed me long, you know I love a good fussy cut!)

I love the fancy boxed corners. They're easier to make than they look!

The top closes with a recessed zipper to keep your things secure.

There's a zipper pocket inside, trimmed with the faux leather. The installation is pretty unique, too... and easy! 


There's also a divided slip pocket on the other side of the interior.


It's a good-sized bag! Here's a selfie of me with it. You can fit a LOT of stuff in there!


It was easy to make - my old vintage Kenmore sewed through it like a breeze, and I think any domestic machine would also. I enjoyed the process. The tassel was a new experience for me - very easy and rather fun. All in all, it's a great pattern that makes a very useful bag, and you can get it (as well as everything else in the Linds Handmade shop) at a discount price through this Sunday, October 10th.

Saturday, August 21, 2021

Charlie Convertible Backpack

Didja notice? It hasn't even been two weeks since I posted last. Woohoo! Haha.

I'm happy to report that I tested another bag for Erin Gilbey of Dog Under My Desk. It's a pleasure to test her patterns, because she does such a great job that there's very little tweaking to do. It's been a while, but that happens when one is busy with a newborn baby. Erin had the baby, not me. Just to clarify. ;-P 

Okay, Grandma G... quit being silly and introduce the pattern! It's the Charlie Convertible Backpack, named after that brand new baby boy. The "convertible" part means that it's an on-the-shoulder tote that can quickly become a crossbody bag or a backpack, all by a slick move with the straps. It's unbelievably easy to adjust! But that's Erin for you... she's a design genius! 

Here's my Charlie in shoulder mode:


In backpack mode:


I don't have a photo of it in crossbody mode, but it's just a matter of lengthening out the tote straps using the sliders.

It can hold a lot of stuff, as shown by my lovely bottom. (There was some discussion in the tester group about our bottoms. Heehee.) The bottom is 14" wide by 5" deep, and the bag itself is 12½" tall.


It closes snugly at the top with a zipper.


The interior has a generous-sized zipper pocket...


... and a divided slip pocket, pleated for lots of room.


As I was in between cataract surgeries for most of the sewing of this bag, I think I managed to sew fairly straight, even though my vision was somewhat wonky. I was thrilled that my rivets came out even, too... on the first try. :)


Here's the back:


I love this bag, and if I were into carrying big bags myself, I'd make another one. This one is going to Courtney's mom, and she selected the fabrics from some options I gave her. No, they're not Jess's designs this time. The prints (quilting cotton) were gifted to me by a very generous friend whom I've never met, and the gold solid is a canvas I had on hand.

The pattern is another DUMD winner! Every construction detail is covered, with step-by-step instructions and actual photos to show what's going on. People are always asking bag designers for videos these days, but I assure you, a video is not necessary with this or any of Erin's patterns.

If you're interested in purchasing, you can get the pattern here, and it is at a discount price through Sunday, August 29th!
 

Sunday, August 8, 2021

Piper ID Holder

Hi to anybody that still takes the time to check this ol’ blog! I’m sorry for the long absence. I simply haven’t been sewing for a while. I did finally do another pattern test last week, and now that the pattern has launched, I can show you. This will be a quick post for two reasons: 1) The project was a very quick sew, and 2) I’m in between cataract surgeries and my eyes are driving me crazy! I don’t see right with my glasses or without. Only 4 days to go till I get the second eye done, though - yay! It’s been a long almost-6 weeks. 

This latest test was once again for Linds Handmade Designs. It’s the Piper ID Holder. Easy to make, even for a beginner, and would be handy for any occasion where you need to have your ID available. (Think school days coming up quickly!)


The fabric I used is quilt cotton from the Typography line designed by Jess (aka How About Orange) several years ago for Cloud9 Fabrics.


The cute little pouch can be used with a lanyard, a wristlet strap, or on its own just to stick in one’s pocket or purse. It zips at the top, so it can hold coins, a chapstick or any other small item, and the ID goes in a separate pocket with a clear vinyl window.


The pattern calls for an optional breakaway clasp for the lanyard. It was suggested in the tester group that a snap would work, so I tried it, but I don’t recommend doing that, as it doesn’t pull apart like it needs to.


So there you have it! The Piper ID Holder can be purchased here, and if you see this post in time, it along with everything else in the shop is on sale through tonight! As always, there is a video tutorial, and there are SVG cut files if you have a cutting machine.

I’m into another pattern test already, so I’ll go get busy on that, as eyes permit. 🤓

Wednesday, May 5, 2021

Dayna Pack at 110%

Two years ago I made a Dayna Pack for myself, which you can see here. It's the first Linds Handmade Designs pattern I ever made, and I'd purchased the pattern. I liked it so much - the easy but unique way she put things together - and I guess that's what got me to volunteer to test her patterns.

I decided last year that that Dayna just wasn't quite big enough for my needs. I often carry eye meds, treats, flashlight, etc., with me when I go out to feed cats and tend to kittens in the summertime, so I wanted something slightly bigger. I looked around at different fanny pack patterns but just kept coming back to the Dayna as still my favorite. So I simply enlarged the pattern to 110%, added some pockets, and here it is!

My old Dayna was made from dry oilskin and quilting cotton. It got pretty dirty, and despite washing it, it just didn't look that great afterwards. So this time I made the whole thing from waterproof canvas, which I love! This way it can easily be wiped clean.

On the back, I made a zipper pocket. Or, at least, I added a zipper. Since the WPC is coated on the back and doesn't fray, I didn't bother to add a lining for the pocket. It's just the area between the outer fabric and the main lining. Yes, you can see raw seam edges and the stitching for one of the slip pockets, but I don't care. I'm just glad for the extra room to stash my cell phone and/or whatever.

Below you can see the pockets I added...

... and this is how they look occupied.


Just what I wanted! And here I am modeling my new Dayna Pack:


 I'm now all set for kitten season. And it's well under way! Want to see a couple? Of course you do!


They're a little shy yet, but we're making progress! 💕


Wednesday, April 28, 2021

Monroe Handbag

Have you ever heard me mention testing patterns for Linds Handmade Designs before? Ha! Yes, I've tested many of her patterns already, and now she has another one out. I'm a little late posting this, so it's beyond time to catch the sale price, but I think all of her patterns are well worth the regular price. (Also, it's a pretty well-known fact that every time she releases a new pattern, her entire shop goes on sale at 20% off, so if you still want to catch the sale price, just wait. I happen to know she's already working on a new design!)

Without further ado, let me introduce you to the Monroe Handbag. Isn't it cute?! That shape! Those handles! This is the front:


Here's the back:


(Side note - Linds also has a Marilyn Wallet pattern. The two make a perfect pair!)

I took a few process photos along the way this time. I forgot to take a pic of the bottom after completion, so here you can see the purse feet right after I installed them. The rest of the collage pics are of the handle-making process. It was kind of involved, although I didn't find it that difficult. (If rolled handles intimidate you, the pattern also includes instructions for flat handles.)


Since the faux leather I used had a white backing, I colored the edges with markers and then sealed them with edge coating.


The purse closes with a recessed zipper, shown here:


The pattern calls for a metal zipper end, but since I didn't have any on hand, I just made my own out of the fabric.


The snap set you can see in the photo above is used to close the end of the bag (and there's one on the other end, of course) to give it its cute shape. 


Below is the view with it snapped...


... and next is how it looks unsnapped. That will give you a little extra room in your bag.


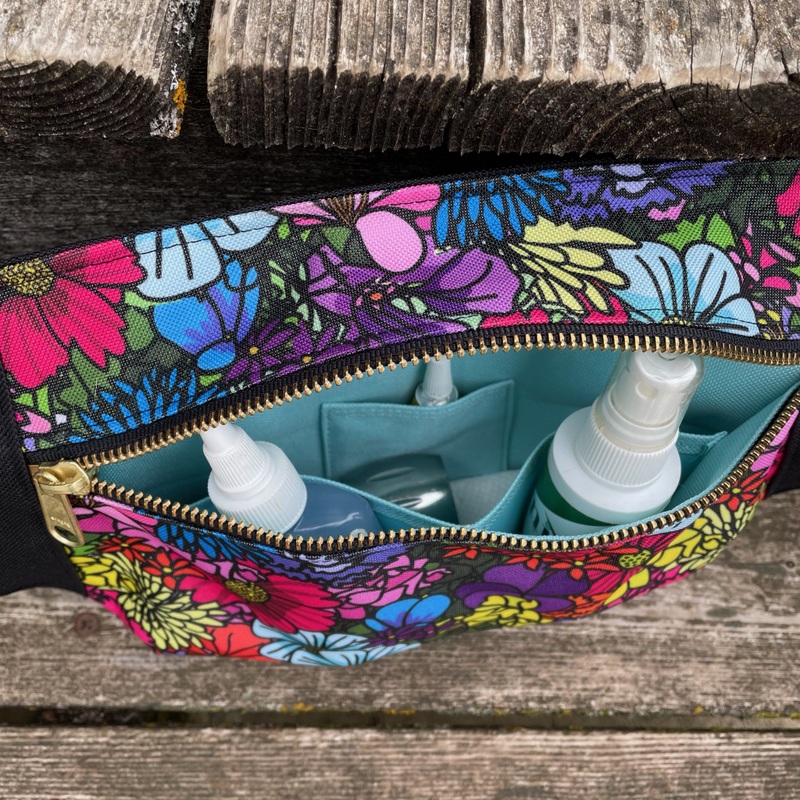
Here's a look inside at the waterproof canvas lining - one side has two slip pockets, while the other side is plain (or you could add more pockets if desired).


The outer pocket on the back (or you could call it the front if you like) is the perfect size for your cell phone to keep it handy.


It's a small handbag, measuring about 10½" across by 7¼" tall by 4" deep. Here's how it looks on my arm.


The outer fabric is some of Jess's now-out-of-print barkcloth. I do love that texture!


So that's it for the Monroe Handbag! I already have another project completed, so if I get in gear, I'll have that posted soon, too. I hope.
 

Monday, March 22, 2021

Slim Sling for me

Believe it or not, I just got my first-ever cell phone this past December. (I know, I’m way behind the times, right?) To top it off, I was coerced. I was perfectly content with my iPad and could do everything on it as long as I had wifi. I really didn't want a cell phone... one more device to maintain and deal with... but Grandpa (who’s had one for years) wanted to ditch the landline, so I’m now the owner of an iPhone 12 Pro. I mean, if I have to get one, why not go for the one with the best camera(s), right? ;) It IS nice to have a camera that fits in my pocket so is handy whenever I’m outside.

It’s worked out well so far just putting it in a jacket pocket for going to town or outside somewhere. But the weather’s warming up and will soon be too warm for jackets, so I figure I’ll need a way to carry it along to town, since I don’t like the idea of having it in my jeans/pants pocket. Here’s my solution: a Slim Sling, from the pattern by Linds Handmade Designs.

If it looks familiar, it’s because I made one before when I tested the pattern. You can get all the details about it here. This one is just a bit different, as I made the version with the zipper pocket instead of the clear vinyl back.


I used cork fabric in my favorite color - teal, and I found the perfect lining fabric, which I’d purchased in a grab bag of scraps.


Here it is, all loaded up with cards and my new phone.


Of course this is too nice to use for working outside, doing cat chores, etc. I have a couple other projects in mind, so check back later and see (but not too soon, because I haven’t started them yet)!

Saturday, March 6, 2021

kraft-tex Purse Pal

Here goes another attempt at a post from the iPad. 🤞🏻

I did another quick pattern test last week. This will look pretty similar to my last post, but it’s a whole new pattern - the Purse Pal, once again by Linds Handmade Designs. It’s longer than the Pocket Pal and has an outer slip pocket, plus six card slots instead of just three.


Once again, I used kraft-tex to make it from, because I think it’s cool... and because it requires no edge finishing. So it was a pretty quick and easy project.


The lining is quilting cotton.


Here’s a comparison between the Pocket Pal and the new larger Purse Pal.


Did you notice the little red flower-shaped snap? It’s a KAMsnap.


So there ya have it! The pattern is at a discount price through this weekend, so if you’re interested, get it now at Linds Handmade! As always, there’s a very helpful video tutorial to show you how it’s done.

Whew! I think I got through this on the iPad. It was somewhat challenging, but hopefully it’s a success. Let me know if you have any issues when viewing it.