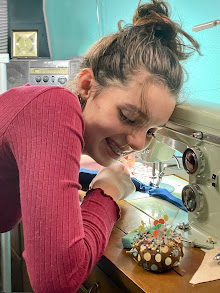
Well, this took longer than I thought it would. Have you ever heard that from me before??? ;) The story of my life. I think when I die, at age 110 or so, that should be inscribed on my headstone. Got that Jess 'n Nate? But then, you'll be in your 80's, so you might not remember. Ha!
This is my last project for the Little Things to Sew sew-along. The project for the month was an Explorer Vest with lots of pockets for collecting things. Courtney didn't want one, though, so I opted to do the Bucket Hat, since I missed out on that one before I joined the sew-along. The hat was easy to make. I took me longer only because I embellished it some. Here's the hat, and please pardon my "milk jar" model. Courtney wasn't available for photos when I finished the hat today.
(Click any photo to enlarge.)

Yes, it's reversible. The band on each side was one of the things I added. I'd seen a cute one here with a band, so I wanted one, too. It wasn't hard to add, but it just made it take a little longer.
I'd actually thought about making this hat already last summer. But I knew that it would need a strap to hold it on in the horrendous winds we get out here on the prairie (like up to nearly 50 mph last Mon. and Tues.!). Yet I wanted the hat to still be reversible. I couldn't figure out a good way to do it, so I never did get the hat made last summer. Then this month I decided to make the hat for the sew-along, so I started wondering again how it could be done. One night at supper the solution suddenly popped into my head! It was so simple!
Here's what I did:

I put a buttonhole just above the brim on each side. Then I made a strap and put a button at each end of it to fasten to the hat. It can be fastened from either side, so the hat can still be reversed! See?

I used a 2-inch strip of velcro to fasten it under the chin, making it somewhat adjustable. So the strap is actually two pieces.

The cool thing is that if you've already made the hat and want to add a strap, you can! I did the buttonholes and strap after the rest of the hat was completed. In fact, here IS Courtney modeling the hat before I finished it! (There always has to be a little goofiness nowadays. Must be the age. I love it!)

The project was not without its struggles. Since the hat is made of canvas (Jess's fabric), that made dealing with the four layers where I put the buttonholes pretty difficult. My buttonholer had no trouble going through it, but I couldn't get them as close to the seams as I wanted, not to mention that I'd intended to make them vertical, not horizontal, but couldn't. Plus it made them terribly hard to cut open! I had to use an exacto knife to cut them, and I did end up cutting some of the stitches, so I used fabric glue to hold them down. It looks a little messy, but it still works, and it doesn't really show under the buttons.

I also had a little pucker problem attaching the brim to the top. It looked better than this BEFORE I ripped out the stitches and resewed it! I should've left it alone. And I wasn't about to do it again!

But all in all, I'm very pleased with the hat, and I love that it has a strap and is still reversible! :)
Linking up to Amylouwho's Sew & Tell:

And to Skiptomylou's Made by Monday:

Linking up to Amylouwho's Sew & Tell: