Saturday, May 26, 2018

Sewing with Courtney

It's been quite a while since I showed you something that Courtney sewed... last summer? She's had something in the works since the middle of March, but since she only had an hour or two after school once a week to work on it, depending on homework quantity, it's been a slow process. But she finally finished it last Tuesday, and we're both pretty excited about it!

After making her emoji pillows last summer, she decided she really enjoys making soft squishy things - stuffies, plushies - whatever you want to call them. Things that are good to sleep with, y'know? So we did a lot of searching for just the right pattern that she would be able to sew. She finally came up with this one:


Yes, a "Mewnicorn"! A unicorn kitty! Perfect for the cat-lover in her! It's a lovely detailed pattern that's even free, and it can be found here. The eyes on it bothered us, however... it seemed to me like I was looking right through its head - ha! I sent a copy of it to Auntie Jess, and here's what she sent back:


Much better, right? So Courtney went to work. She did ALL of the work. I only instructed a little bit.

She cut it out, carefully using a rotary cutter.


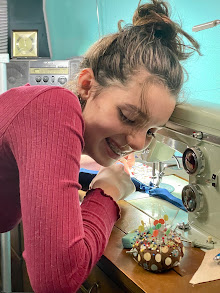
She did great with remembering how to thread the sewing machine.


Since she was well-practiced at sewing on appliques, this was a breeze for her.


Look at that beautiful job - front and back!


Sewing on the round bottom was a new experience. It involved lots of Wonder Clips.


She took it slowly and did an excellent job.


Here's the body, all ready for stuffing.


Stuffing is not really fun. To do the best job, you have to break the polyfill into small bits so it doesn't get lumpy. It takes a long time to fill a body this big. And you get covered with tiny fuzzy bits. But she persisted!


There was a LOT of hand sewing involved, too. Other than the appliques, all the other bits were hand sewn on with the ladder stitch. I thought she'd get tired of that, but she never lost her enthusiasm, and week by week, she made progress.


So ta-da... here we have the completed Mewnicorn with her proud creator!


Our photography assistant helped us out for a little size reference. For the ear size, y'know? ;-Þ


Needless to say... Courtney loves it!


I thought with all the detail and hard work, it would make a good 4-H/fair project. After some serious consideration, she decided 'nope'. She wanted to be able to sleep with it, etc., right away rather than have to leave it sit so it didn't get messed up and pilly. Plus, she didn't want other people touching it at the fair. Perfectly good reasons, I'd say!

So for the fair? We have another project all figured out. In fact, she's shopping for fabric for it this weekend! And with school nearly out (2½ days left), she'll have longer hours here (and no homework), so it won't take nearly as long to make. Of course, we probably can't show you till fair time in August. Patience......

Saturday, May 12, 2018

Spring Fling bag

I was privileged once again to test the newest pattern by Dog Under My Desk... this time the Spring Fling bag. It's another winner, and has possibly become my new favorite bag (although since I've made so many fun ones it's really hard to say). The hardest part of making any bag often is deciding which fabrics to use for it! I went through many options for this bag, but then I found a piece that Jess had brought me back from Japan a few years ago, and it seemed to be the perfect choice. Here's my bag.


The fabric was reversible and had a totally different print on the other side, so I decided to use that side also, for the lining. The entire bag was made from 2/3 yard of 44" wide fabric, plus one little pocket lining piece that I just couldn't squeeze out of it. The fabric was like a soft, light-weight canvas, and it handled beautifully! Even turning the bag inside out and back a few times in the process of making it didn't produce any wrinkles. I wish I had a lot more!

Here's what the other side of the fabric looks like.


The pattern includes Erin's detailed instructions for a zippered pocket with no raw edges showing, and her method makes it easy to end up with a perfectly aligned zipper.


See the inside? Even the zipper tape is enclosed. Awesome! And easy!


(Forgive the color differences, as some of the pics were taken at night under artificial light.)

There's also a slip pocket on the inside.


The top zipper installation is pretty unique, too, and it works out so well. Sewing those ends was a bit challenging for me because of the heaviness of my fabrics, all of which I'd interfaced too, but my trusty old Kenmore made it through again! 


The centering of the little trees on those tabs was only coincidental, but it made me happy.


And then there were the pleats. Oh, the pretty little pleats!


These turned out to be my best ever, thanks partly to the cooperativeness of the lovely fabric, plus having had some practice making them before on my Roundabout Hobo bag and my Encore Clutches. But they're not hard to do, regardless.


Here's the obligatory size reference photo taken hastily (due to sprinkles falling on us) by my favorite photography assistant, Miss Courtney. It was her first time using my DSLR, and she did well.


So there you have it... another fun one! The pattern got rave reviews from all the testers, myself included, so if you have a hankering for a bag like this, purchase the pattern now while it's 20% off (through Monday, May 14th). You can also check out the pattern page for more details, photos and other options (such as the accent panel and a crossbody strap). Erin will soon have her blog post up with more tester photos, too.