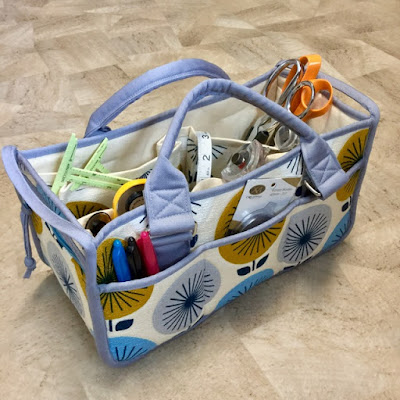
I mentioned at the end of my last post that I had a project in the works but that I was struggling with it. I did manage to finish it, but it wasn't easy! It was worth the battle, though (more on that below), and here it is!
It's the "Catch All Caddy", which is a ByAnnie pattern, and it can be found here. (Tip: you might be able to find it cheaper on Etsy!)
I've wanted to make something for myself from this fabric ever since it came out, but I just never found 'the right thing', y'know? Finally I did! I think it looks great on this caddy. It took some fussy cutting, and since it's a one-way design, I had to seam the piece that goes across the bottom (which the pattern calls the "side piece" but I consider more of a gusset) so that the print was right side up on each end. The fabric is barkcloth, designed by Jess (a.k.a. How About Orange) a few years ago. It's called Sunburst, from her Time Warp collection for Cloud9 Fabrics. (Hmm... 4 years ago already!)
I used a solid canvas for the lining, and the handles, bindings, and sleeve for the base are made from a twill fabric.
All the side and pocket pieces are quilted with ByAnnie's Soft and Stable in between. I quilted mine by sewing around the circles, which I found rather fun. Here's a close-up view of it (as well as the luscious texture of the barkcloth.
Once again, I used lots of Wonder Clips in the process!
The pattern was good, with lots of helpful tips and even a page of little labels that you could copy and print to help keep track of what each of your pieces was. The pattern also lists a nice video tutorial done by Annie on how to join the ends of bindings. It worked perfectly for me. (There is also a set of video tutorials done by someone else on YouTube on making the caddy. I watched them but wouldn't recommend them. I think it's better to just follow the pattern instructions.)
As you may have guessed by now, considering the fabrics I used plus the Soft and Stable, my seams were rather thick. Here's how thick - yikes!
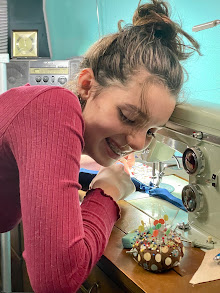
When I chose my fabrics, I had no idea how many layers I would have to be sewing through. I just figured my good ol' 49-year-old Kenmore could handle just about anything, so I wasn't worried. I should have been. When it came to the final binding that goes around the outside, I seriously thought I wasn't going to be able to do it and would have to finish the second side of the binding by hand. But I gave it a try, and despite 3 machine lockups and 3 broken needles, plus several do-overs, we made it! It's not the neatest work I've ever done, but since the caddy is for myself, I'm okay with it. I'm just glad to have it DONE!!! And I'm very pleased with the over-all look of it.
I included a little secret inside. Right down in that bottom corner. Can you see it?
Have a closer look below. I kept a bit of the selvage with Jess's (my daughter, for those of you who might not know) name on it as a little memento. I like it.
For some size reference, here's a shot of my caddy loaded up with sewing supplies. It holds a ton of stuff! It'll be great for hauling things between my upstairs "fabric room" (where it all seems to have migrated due to better lighting for matching colors, etc.), my kitchen table where I do my cutting, and my basement sewing room.
So that's done. Whew! Hardest sewing I've ever done. But now I feel like I can conquer ANYTHING, especially bindings! Hahaha! I do have more projects lined up, one of which is already begun, and another which is a pattern test (but not for Dog Under My Desk this time). Not to mention various other "when I get time" ideas.


