Friday, August 15, 2025

Done. Finished. The end.

Wow! Where do the years go?! It blows my mind to think it’s been nearly 18 years since I wrote my first post! So many memories are recorded here. It also blows my mind to think that my only grandchild has grown up through those 18 years, has now graduated from high school, and will be starting college in less than 2 weeks!!

As I’ve maybe mentioned a time or two, I’ve considered ending my blogging journey. Somewhere in the last year or so, I decided that Courtney’s graduating from high school would be an appropriate time to call it quits here, since so many of my posts have included her. As is my usual style, I’ve procrastinated at that, too, but now it’s really going to happen. This is my final post to the ol’ A Photo’s Worth blog. I’ll try to keep it ‘short and sweet’, but that might be hard.

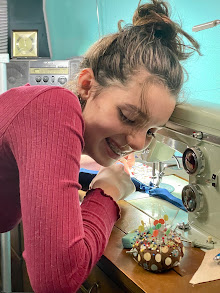
To begin the end, here’s Courtney right after the graduation ceremony. To say I’m super proud of her and all her accomplishments would be an understatement. I love her so much!!


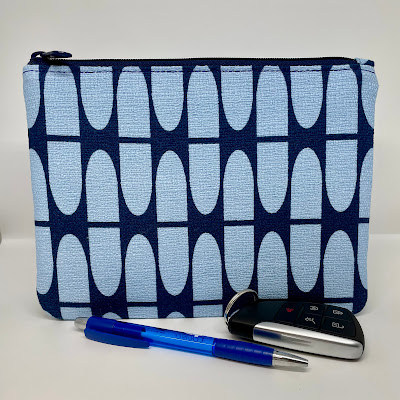
Of course, what kind of a celebration would it be without a handsewn gift from Grandma G? I made a couple of little Dog Under My Desk pouches to hold little gifts, one for Courtney and one for their exchange student from Italy. Courtney’s is the one on the left.


In Courtney’s pouch I tucked a little metal card I’d found online. I hope she pulls it out and gets some encouragement sometimes.


Ask me if I got teary when searching for the perfect gift items! 

I was happy to find a card that said just what I wanted to say to her.


So graduation happened and was celebrated with a perfect weather day and a lovely outdoor party at their house. 

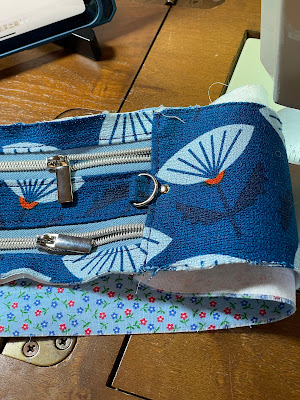
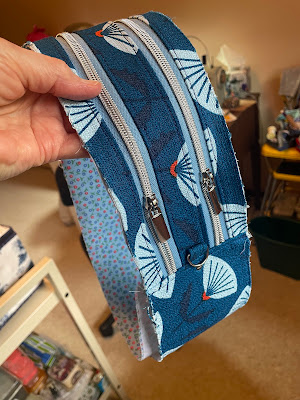
A few weeks later, Courtney asked me if I’d make her a little purse. I was delighted that she asked, and of course I said yes! She chose a pattern she liked and fabrics from my stash, and I went to work. In keeping this short, I’ll just show you a collage of some progress photos I took along the way. You can click on it to enlarge and see details better if you wish.


The pattern was from the Pisces Pack add-on to the Aries Crossbody bag by Knotted Threads Co. I have to say, Shannon’s patterns can’t be beat! She has all the details and tips to make a bag a success, as well as a video tutorial. The purse came together very well, with the biggest challenge being getting the top edge of the bag under my presser foot to get started on the final topstitching. 

Here is the purse I made for Courtney. We were both pretty pleased with how it turned out.


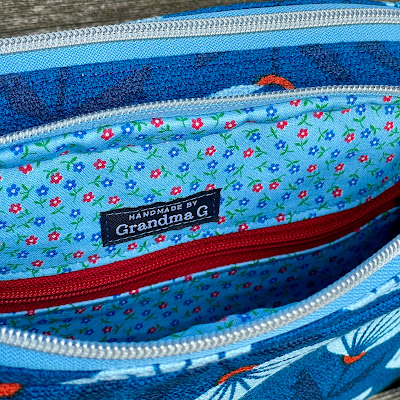
(Hey, I remembered my label!)

The coolest part of the bag was the quilting on the front and back. The pattern included the how-to to make it come out just right.


Here’s the purse on its first major trip - to Universal Studios in Orlando! Courtney, her mom, and Auntie Jess went on a girls’ trip to celebrate graduating and just to have some fun together, which they did. (Ignore the fact that Jess is NOT carrying a Grandma G-made purse. I don’t know how that happened!!)


So that’s it, folks. My last post. The blog will remain online as long as Blogger doesn’t shut down, so feel free to browse through any old posts. I bid you all a fond farewell, and you can still find me on Instagram - @grandma_g415. Bye-bye! ❤️

Thursday, August 7, 2025

Rayna Sling bag

This post is long overdue, but I wanted to get it in here… better late than never, right? I tested another pattern for Linds Handmade Designs in… ahem… May. 🫣 This is the Rayna Sling, and it’s called that because it’s kind of a combo of her Dayna Pack and Rae Dual Zip Crossbody bag, both of which I’ve made. It’s quite a small bag yet holds a lot. I love it!


The hardest part of any bag making seems to be choosing the fabrics. Because I have such a stash of supplies, I’m trying not to buy anything new but instead use up some of what I have. So I have to coordinate exterior and lining fabrics with zipper colors and in this case, a webbing strap. I was pretty pleased with what came together here, after trying out numerous combos. The strap and the lining were even “grab bag” purchases. The exterior and lining were two types of waterproof canvas, which I like to use because they’re pretty firm and don’t require any interfacing.


I also used some scrap pieces of cork fabric to make the fancy ends of the strap. Cool, aren’t they?


There’s a mesh pocket on the inside of the bag. I’d tried to use what fold-over elastic size I had, which was only 1/2” wide, and just wasn’t pleased with how it turned out, so I did order some 1” from an Etsy shop. I was hoping there was a color in the variety pack that would work, and it turned out that the bright pink was perfect!


See what a difference the wider size made?


So this is my Rayna Sling. Yes, mine. I’m keeping it. 


The pattern can be purchased here. Like all of Linds’s patterns, a video tutorial and SVG files (for a cutting machine) are included. It was pretty easy to sew, and I’d happily make another.

Monday, June 23, 2025

Raw Edge Get Carded Wallet

If you’ve been following my blog long, you may remember I made a number of the Get Carded Wallets from the pattern by Dog Under My Desk. Here is a link to a few of them, and you can search the blog to find several more. 

Erin decided to write a new pattern for basically the same wallet only using a non-fraying fabric such as cork or certain vinyls, so the edges can be left raw. This is my tester version of that new wallet. The outside has the clear vinyl window for a driver’s license or whatever.


There’s a small zipper pocket on the back to hold change.


Here’s the inside, which has four card slots and a couple of slip pockets for bills, receipts, etc. Those rounded flaps contain invisible magnets to hold the wallet closed.


Below is a look at it loaded up inside.


I love it, and it went together so smoothly! I used some charcoal cork that I had gotten from an Etsy shop (that no longer sells it) a few years ago. It doesn’t take much, so it’s a great scrap buster!

That was my practice wallet. Jess, who is a long-time user of one of my original Get Carded wallets, decided she could use an upgrade, so I made another one in her choice of colors. For this one I used magnetic snap rivets instead of the hidden magnets. They give the wallet a little snugger closure.


So here’s Jess’s wallet. I just love the wine color of this cork, which I got from that same Etsy shop.


Comparing the two:


I painted the raw edges, which gives them a more finished look (and because I think it’s fun to do!). In these comparison photos, you can see that the hidden magnets (bottom pic) lie a little flatter and make for a slimmer folded wallet. Either style works well, though.


So there you have it… the Raw Edge Get Carded Wallet! It’s fun to sew and makes a very nice and handy little wallet.

Tuesday, June 3, 2025

Heartfelt Haven Pouch

Hmm… I seem to be getting further behind, rather than catching up. In other words, I’m doing more sewing than blogging. Well, here’s a quick one… another Christmas gift. (Shhh… I know it’s already June!)

This is the Heartfelt Haven Pouch by ChrisW Designs. It was fairly quick and easy to make, and the best part is that it was a free pattern! Who doesn’t love free?!


It’s a rather unique pouch in that it actually has three pockets under one zipper!


You’ll probably recognize the fabric I used for the exterior, which is barkcloth that Jess designed a few years ago. I still love that barkcloth texture!


That’s it for this post! You’re welcome. ;)


Tuesday, April 22, 2025

The Sunny Saver

Back in November, I did another pattern test for Linds Handmade Designs. (Yes, she’s a very prolific pattern writer!) She designed it as a case for those large sunglasses that don’t fit in just a regular glasses case, thus the name “Sunny Saver”. 

This was a pretty quick and easy project to sew. I made my tester version out of waxed canvas for the exterior…


… and some coordinating flannel for the interior. The flannel is soft and will protect sunglasses from getting scratched. It kinda reminds one of a mini sleeping bag though, doesn’t it? Ha!


I always love the look of a nice straight zipper install!


After my tester case, I made another one for Jess because she’d mentioned long ago that she needed a case for her sunglasses. Hers of course had to be (reddish) orange, so I used up a scrap of some vinyl I had left from a number of other projects. She chose the pink zipper and the matching lining fabric. She said the pouch works great for her glasses!


It could also serve a lot of other purposes, one of which might be storage for sewing tools.


Then I had to make one more, just because they were so quick and fun to make! I love this one, which went to Courtney for Christmas.


I added a tiny pocket on the inside to hold a gift voucher from a favorite online jewelry shop.


So there you have it. Three Sunny Saver pouches!


I wouldn’t be at all surprised if I made more of them. They’re just fun to make, useful for so many things, and they’re great scrapbusters! BTW, it’s an inexpensive pattern yet includes Linds’ usual tutorial video and SVG files for cutting machines! It’s a great bargain!

Thursday, April 3, 2025

Rae Dual Zip Crossbody bag

Wellllll… I seem to be farther behind than I thought I was. Would you believe I made this bag last June?! BUT, the reason I didn’t show you right after I completed it (not procrastination this time) was that it had to remain a secret. Until OCTOBER! It was a pattern test for Linds Handmade Designs, and it was for her first-ever pattern for the Bag of the Month Club, which was pretty exciting! If you’re not familiar with the BOMC, it’s a subscription where there are three (sometimes four) different designers’ patterns released monthly, one at a time. You buy them all at a discounted price, not knowing what they are until the month they’re released to subscribers, and they can only be gotten through the subscription (until they’re released 3 months after their subscription month). Linds was the last designer in that subscription, so her pattern was for the month of October, but it still had to be completed and approved before the subscription started in August. I was excited to be able to test and get to know ahead of time what one of the BOMC patterns was! 

Here’s my tester version of Linds’ Rae Dual Zip Crossbody bag:


The pattern was a bit of a challenge, thus not listed as a beginner pattern. The most challenging part for me was sewing the curves on the outer front and back, because there was some thickness there. But the pattern had lots of tips for getting it right, and it was totally doable.

The fabric I used for the exterior was one of Jess’s barkcloth designs from a few years ago. In my usual fashion, I had to do some fussy cutting and print matching. It nearly blew my mind thinking how to get it just right, but I was successful!


Underneath that flap on the front of the bag is a hidden zipper pocket.


The bag is divided into two compartments, each with its own zipper. It also kind of blows my mind wondering how Linds figured out how to design such a bag, much less write a pattern explaining how to make it! My mind sure doesn’t work like hers does! Ha!


Inside one of the compartments is another zippered pocket. (I remembered to add my label - yay!) The inner seams are bound, but not to be feared… they’re done in a very easy, no-fail way, and they turn out looking great!


This is a very nice size bag, and I love it! 


Here are just a few progress photos I took along the way.


Yep, it was work putting it together, but so worth it!

That subscription is over and the pattern is now released for anyone to buy, so if you’re an experienced sewer or even an adventurous beginner and want to give it a try, you can purchase it here. The pattern includes a very helpful video tutorial, SVG files, and even projector files.

Hopefully I’ll be back soon, because I have some Christmas sewing and another pattern test to show you!

P.S. If you have a little one to buy an Easter gift for, or just want something cute to decorate for Easter with yourself, Courtney has some adorable chicks listed in her Etsy shop now!