What do you do when you get a gorgeous pile of fabrics like this...
... shipped to your door? They are samples of Jess's newest barkcloth collection, called Holding Pattern.
Cloud9 Fabrics shipped them to me to make sample items for them to take to
Quilt Market in Houston the end of this week. I received them last Monday, and of course I sewed... which explains my extra-long absence from the blog.
Here is one of the items I made. Jess and I were gifted the pattern for the
Harriet Expandable Tote from Alicia Miller (thanks, Alicia!) of Swoon Patterns, and this is the result.
Although I wouldn't recommend it for beginners, it was a great pattern with lots of details and easy-to-follow instructions. In my usual style, I made it a little more complicated by insisting on matching the print. See how my pieces line up? It wasn't as hard as it looks, and once I had the first side piece cut, the rest were a piece of cake, since I'd cut both main pieces identically.
Also making the bag more challenging was the use of pleather. Jess bought some wonderful yardages from
Discounted Designer Fabrics (she ordered one day and I received them the next!), and the one she chose for this bag even has some real leather in it. It is thick and cushy, yet sews through easily. I made the handles first, using my favorite
tutorial by Emmaline Bags, because there are no raw edges when completed.
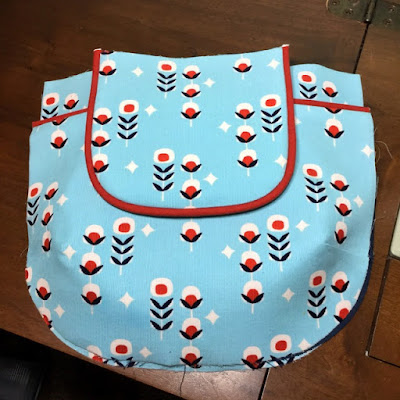
Here are some more progress photos. The tote has zippered expandable sides.
Of course with all that pleather, I was again most appreciative of my Wonder Clips, in both sizes.
I tried something new this time. I've used foam stabilizer before, but this time I tried Pellon's
fusible foam. I thought barkcloth would be a good test fabric for it, since if it didn't adhere well and got ripply, the texture of the barkcloth would hide it. I was quite pleased with how it worked out. It seemed to fuse well, and if it's come loose anywhere, I can't tell it. (I need to experiment with it on quilting cotton sometime, because I've heard conflicting reports about it.) I trimmed off all the seam allowances before fusing, so there was no problem when sewing. It makes for a nice sturdy bag.
I tried something else new, too. I'd installed a twist lock closure before but found cutting the hole just right to be challenging. I happened to come across a set of punches of various sizes and shapes on Amazon, so I bought a set. Here's the punch I used. It wasn't exactly the right shape, but the initial cut was made easily with it and then I only had to trim tiny bits away with a scissors.
In case you're wondering... no, I did not wear safety "googles". But I didn't lose an eye or anything, either.
Harriet has a zippered pocket inside, and the zipper installed successfully.
After it was all made, of course came the photo session. I had lots of "help". Jasper was the worst. He's a little too loving... and curious. But he can serve as a size reference, since he refused to take a pic of me holding the bag.
Harriet is a very roomy bag, especially when the expandable sides are unzipped.
This next photo was taken indoors without Jasper's help, and it shows Harriet with her sides expanded.
Just for fun, here's a close-up of that matched seam and the topstitching to the right of it.
I enjoyed making this bag, even though I was feeling some (well, a lot of) pressure to get it done on time (I shipped it to Cloud9 yesterday). It was a lot of work, as I counted 47 pieces by the time I had it all cut out, and the pleather made it feel like I was wrangling a lot, but it was all worth it in the end. I think I'd make another, although I'd be inclined to use fabric trim instead of pleather, just to make it a little easier.
BUT... that's not all I made from that beautiful fabric! There are two more projects, so come back soon (hopefully tomorrow) to see the next one!


