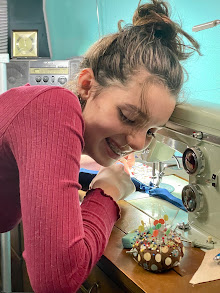
Monday, December 10, 2012

All is calm, all is bright

Very, VERY bright, with the sun shining on the fresh, new snow! Only a faint breeze. Cold, though... 4°F below zero when I got up. Pretty to look at, at least, especially against the lovely blue sky!


Roads are open, school started on time. It's lookin' like Christmas! Yikes! Only 2 weeks till Christmas Eve... I'd better get busy!!!

Sunday, December 9, 2012

Yep, it's winter. *sigh*

We got a little more snow overnight, as you can see by the evergreens. 


Everything was pretty peaceful first thing this morning.


But by mid-afternoon, under our first blizzard warning of the season:


Our yard is fairly sheltered. That was a look in back of the house (the noise was a vent flap blowing and banging in the wind). I can only imagine what it was like out in the open. Now a look out the front. I was noticing the "tumbleweed" (that dark blob on the snow) and hoped to catch it tumbling in the wind. I did... watch for it!


We got a few inches of snow, but not nearly as much as other places have gotten or are still going to get. I guess our pleasant fall is over. Was sure nice while it lasted!

Saturday, December 8, 2012

It's beginning to look a lot like.....


Poor Rainbow doesn't look happy.


The juncos are having a little harder time finding food.


It's somewhat foggy, too... can't see the neighbor's place at all.


"There's no good place for my feet!"


That was this morning. It sounds like there's more on the way tonight. And wind. And below zero tomorrow night. Yep, winter's arrived, folks. Enjoy?

Friday, December 7, 2012

Tack-It Pattern Marker

Here's another of my favorite sewing tools, which I've had for 30+ years. Yeah, it's definitely old... just look at the price marked on it, a whopping $1.98! You sure couldn't buy one (or much of anything else, either) for that now! In fact, they don't even make these anymore. I did a little searching yesterday, and you can still find them. Etsy has had them, listed as vintage, of course, but I didn't see any available right now. However, eBay has quite a few of them, in case you might want to get one for yourself or as a unique gift for a sewer on your Christmas list.

(Click to enlarge.)

It is, as the title indicates, for transferring pattern markings onto fabric. There are various colored carbon papers that come with the Tack-It, and you choose one that will contrast with your fabric color, so the markings will show up well. Then you slip the carbon paper, colored side toward fabric, under your pattern onto wherever you need to mark.

In this next photo, I have my two fabric pieces right sides together, so I've put the paper so the marks will be on the wrong sides, and I'm marking both sides at once. I then slip the Tack-It tool on the outsides of the paper and pattern piece so the marking part is right over what I want to mark, then just give that little knob a whack! (I think my kids used to call it "the banger" or something like that.)


It beats the old-fashioned taylor's tacks (which I happened to find a recent demo for yesterday) or tracing wheels, and it works better than trying to hold your pattern piece in place while you lift it to mark under it with a pen or something. Here's a picture of the marks it left where those notches were:


It marked both sides at once - yay! So that's how it works.

I'll be posting at least one more favorite tool sometime next week, so do come back if you're interested in sewing tools!

Now you can tell what kind of fabric I'm currently working on. It's not Jess's this time. Well, it IS Jess's fabric, but she didn't design it. ;) I'll show you when I'm finished!


Thursday, December 6, 2012

Crafting with(out) Courtney

Besides designing fashions on my iPad Tuesday, Courtney also did some crafting. Unfortunately, I wasn't on the ball with the camera (was too busy helping with the crafts to even think of it) while she was making stuff, so I didn't get any pics of her in the process, and I only remembered to snap these quickly just before she left.

These little squirrels were cut from templates found here. (I printed them out wrong the first time, thus I ended up with the smaller one, too... but it worked.) They are meant to be Christmas tree ornaments, but we just barely got them done this far before Courtney had to leave, so she was going to find string at home to hang them with. I like how she decorated the squirrels' tummies.


Below is a "Bunnyfur" paper doll and several sets of outfits for her. Courtney cut them all out while I was washing a couple of windows.


I got the free PDF file of these by leaving a comment on a blog somewhere... but I don't remember where. It matches a new iPad/iPhone app called Bunnyfur's Christmas (found in the app store), which is really cute and has lots of touch activities for kids!