
Thursday, August 9, 2018

Sewing with Courtney - 4-H project

Hold onto your hats, folks... here I am with the second blog post in a week! I know - shocking, right?!

The 4-H Fashion Revue suddenly came around Tuesday night, and now I'm free to post the photos of Courtney's garment construction project! So let's get to it... here she is, cutting out a maxi dress! I even let her use my Martelli rotary cutter, which she definitely favored over the other ones I have (as do I).


She did all the cutting and all the sewing herself. I only gave some guidance, particularly with the pattern instructions.


She made faces at me occasionally as I was taking the requisite project photos. This is the only one I figured I could get away with posting. Ha!


There was some hand sewing in a couple of small spots. She's really good with the ladder stitch, since she's used it on other projects, too.


Probably the trickiest part to sew was the casing for the waist elastic, since it was inside the dress after the side and back seams were sewn. She took lots of care to make sure she didn't get any extra unseen fabric from underneath into her seams.


This is the pattern she used. It was a great one for sewing a first dress.


Here is her version. 


The fabric she'd chosen was a modal rayon, which was nice and flowy.


We had another windy day for our photo shoot, which was a bit frustrating, but I think it actually helped to show the flowiness of the fabric.


I should've had her lift her hair so you could see the drawstring that gathers the top and ties in the back. Oh, well... just imagine a bow under there. :)

She paired it with a white vest for the Fashion Revue, and here she is modeling it. She took top honors for her construction!


Also for the Fashion Revue, she modeled a purchased dress. I think this outfit is just so adorable on her!


Her last outfit was a "recycled" one that she put together. It also got top honors. So cute, huh?
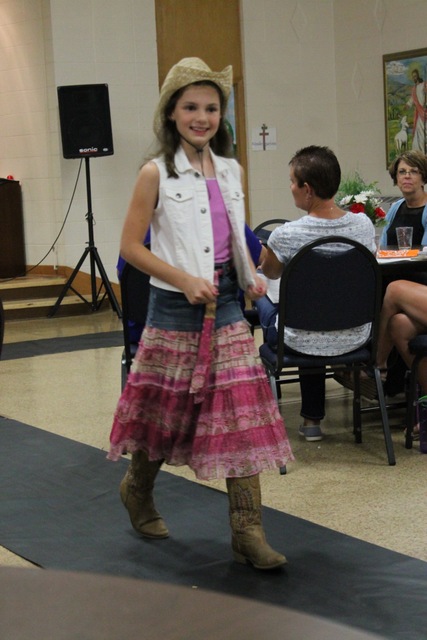

That's it for the Fashion Revue, although she did play piano in between the modeling, but I could barely see her, so I have no photo of that. Courtney has lots of other projects for the County Fair, both for 4-H and open class, but I didn't help with those and don't have any photos. The dress-making kept us busy enough this year. :)

Monday, August 6, 2018

Gadget Guard #4

I bought something for myself a couple weeks ago. I don't use my PC much anymore, instead doing almost everything (except blog posts, which unfortunately I can't do) from my iPad. When it comes to lengthy emails or something requiring a fair amount of typing, I get tired of the ol' two-finger method, and I finally decided to check into getting a keyboard to use with the iPad. I found a nice one on Amazon, battery-operated and with Bluetooth. It didn't cost as much as I expected. Here it is.


I love it, and it works great! I don't use it all the time... just for the lots-of-typing stuff... but when I do, I find it very helpful.

I'd been meaning to make a new Gadget Guard for my iPad anyway, because the only one I have that really fits it is this one, which is useful for around here, but it's not very classy, y'know? So I decided to make one that would fit the iPad and keyboard together, and I used this barkcloth designed by Jess awhile back. By the way, this is the front pocket, after I'd pleated it. Can you see the pleat?


Yes, there's a pleat in there, although it's slightly off-center. It's also somewhat narrower than what the pattern calls for, in order to make the design line up, but that's fine, as the iPad charger is small and doesn't take up much room. It took some thinking about how to get everything to line up right... it kinda twists my brain every time I get to fussy cutting something like that, but it worked! Here's my new Gadget Guard, completed.


I love that the pattern is customizable for any size gadget. See what a nice snug fit it provides?


Since the keyboard is only ¼" thick, the iPad still fits nicely by itself, too. Of course the Gadget Guard is padded with foam (Soft and Stable, in this case) to provide protection.

Here's a closeup of the barkcloth. I just love its texture!


The Gadget Guard pattern is by Dog Under My Desk. As always, I highly recommend Erin's patterns. They are absolutely the BEST! I've tested a lot of them, and I know how much work she puts into them and how she does her best to make sure her customers (even inexperienced sewers) end up with terrific looking bags! Incidentally, she's working on a new pattern for a zip-around wallet that looks pretty fantastic! It'll be ready for testers very soon (this week?) and available for purchase hopefully before the end of the month. Watch for it!

Now just for fun, here's my photography assistant, a.k.a. my bestest photobomber! If you follow my Instagram account (grandma_g415), you've seen plenty of pics and videos of her.


She's 9 weeks old, beautiful, crazy-fun, and I love her to pieces. And she currently lives in the garage... even though I swore I'd never have cats/kittens in the garage again. Ha! Long story. ;)

Monday, July 23, 2018

Hip Pouch

Hi again, finally. Bet you thought I'd given up on the ol' blog. Nope! I'm still sewing things, but I haven't posted because one thing I finished is for a gift that hasn't been gifted yet, so I can't show you. (I'll tell you this much, though... it's super cute!) I've also helped Courtney sew her 4-H Fashion Revue garment, which is finished and she did a fabulous job on, but it can't be shown until County Fair time... the middle of August. So... be patient.

In the meantime, I'll show you a quick little pouch I made last week. I needed something to carry things when I go to feed and care for my outside cats - treats, eye antibiotic, flashlight, etc. - so I didn't always have to stuff everything in my pockets. When I came across this tutorial for a hip pouch (a.k.a. fanny pack, etc.), I thought it was just the thing! The original tutorial is by Daisy Janie and the beginning of a 3-day sew-along for it can be found here. There is also a very helpful video tutorial (by Michelle Wootton of Birdcage and Thread) for it here. It's very easy to make!

I chose to make my pouch in denim, because it will get at least twice-daily use and will no doubt get dirty in time. The denim, in fact, used to be part of an old pair of jeans.


Thanks to the wide pleat across the front, the pouch opens out to hold quite a bit of stuff. I thought this Paw Print fabric by Timeless Treasures was quite appropriate for the lining.


I changed the strap closure a bit by adding a rectangle ring to the side to run the strap through and then used hook-and-loop tape to fasten it, making it adjustable and easier to use than the tutorial's instructions to have the strap close in the center back.


The only other thing I would change if I made another would be to make the inner pockets a little taller. I didn't get a photo of them, but they're not very big and don't hold much.

Here's a photo of the pouch on me, so you can see the size and how it fits.


And one more photo just for fun because it has my favorite little photobomber in it. :)


So there you have it, for now. I have a bazillion more things on my list of Things-I-Want-to-Sew, so next I'll make something more that I CAN show you.

Saturday, June 16, 2018

Flip Flop Wallet #3

Yep, still sewing here (also gardening, which has slowed down the sewing a bit). I just haven't gotten around to posting my last project, plus I'm working on something now that is a gift and will have to remain a secret for a while. Also, Courtney is working on a project for the 4-H Fashion Revue (and that'll have to wait till August to be revealed).

My last project was little. It was another Flip Flop Wallet (pattern by Erin Gilbey of Dog Under My Desk). I decided I needed one to go with my new Spring Fling bag. I made a couple of changes to this one. Instead of the strap that wraps all the way around the wallet, I made a narrower one that came out of the back side seam. I didn't want to cover up any more of the cute fabric (that Jess brought me from Japan a few years ago) than that. I also use a KAMsnap fastener instead of a magnetic one. I had to wrack my brain a bit to get the placement just right (not to mention rip a few stitches in the process), but I'm pleased with how it turned out.


I only had very small scraps left from the fabric, not even enough for the whole wallet outside, so I spliced it to a piece of solid canvas for back part. It worked!


I kept the inside solid to avoid too much busyness.


And here you have it... the Spring Fling bag and its very own Flip Flop Wallet.


If you want to look at my other Flip Flop Wallet here, you'll see why I needed to make a different one to go with this bag. :)
Saturday, May 26, 2018

Sewing with Courtney

It's been quite a while since I showed you something that Courtney sewed... last summer? She's had something in the works since the middle of March, but since she only had an hour or two after school once a week to work on it, depending on homework quantity, it's been a slow process. But she finally finished it last Tuesday, and we're both pretty excited about it!

After making her emoji pillows last summer, she decided she really enjoys making soft squishy things - stuffies, plushies - whatever you want to call them. Things that are good to sleep with, y'know? So we did a lot of searching for just the right pattern that she would be able to sew. She finally came up with this one:


Yes, a "Mewnicorn"! A unicorn kitty! Perfect for the cat-lover in her! It's a lovely detailed pattern that's even free, and it can be found here. The eyes on it bothered us, however... it seemed to me like I was looking right through its head - ha! I sent a copy of it to Auntie Jess, and here's what she sent back:


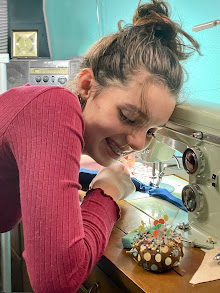
Much better, right? So Courtney went to work. She did ALL of the work. I only instructed a little bit.

She cut it out, carefully using a rotary cutter.


She did great with remembering how to thread the sewing machine.


Since she was well-practiced at sewing on appliques, this was a breeze for her.


Look at that beautiful job - front and back!


Sewing on the round bottom was a new experience. It involved lots of Wonder Clips.


She took it slowly and did an excellent job.


Here's the body, all ready for stuffing.


Stuffing is not really fun. To do the best job, you have to break the polyfill into small bits so it doesn't get lumpy. It takes a long time to fill a body this big. And you get covered with tiny fuzzy bits. But she persisted!


There was a LOT of hand sewing involved, too. Other than the appliques, all the other bits were hand sewn on with the ladder stitch. I thought she'd get tired of that, but she never lost her enthusiasm, and week by week, she made progress.


So ta-da... here we have the completed Mewnicorn with her proud creator!


Our photography assistant helped us out for a little size reference. For the ear size, y'know? ;-Þ


Needless to say... Courtney loves it!


I thought with all the detail and hard work, it would make a good 4-H/fair project. After some serious consideration, she decided 'nope'. She wanted to be able to sleep with it, etc., right away rather than have to leave it sit so it didn't get messed up and pilly. Plus, she didn't want other people touching it at the fair. Perfectly good reasons, I'd say!

So for the fair? We have another project all figured out. In fact, she's shopping for fabric for it this weekend! And with school nearly out (2½ days left), she'll have longer hours here (and no homework), so it won't take nearly as long to make. Of course, we probably can't show you till fair time in August. Patience......