Showing posts sorted by relevance for query Hipster. Sort by date Show all posts

Friday, May 5, 2023

Two Zip Hipster Bag #3, modified

A few years ago (oh gosh, it’s been over 11 already!), Jess asked me if I would make her a Two Zip Hipster bag from the pattern by Dog Under My Desk. I did so, and it was such a great pattern that it began my love for all DUMD patterns, most of which I ended up testing after they were written. She then thought it would be fun if I made a second Hipster out of another of the canvas fabrics she designed. Since I thought it’d be fun, too, I agreed. So this one is the bag she carried for many years until it finally wore out (she had gifted the first one).

Fast forward 11 years, and she asked me if I’d like to make her another Hipster! Who am I to say no? Ha! This time she’d seen some fabric I’d gotten in a terrific grab box I’d come across, and she asked if she could have it for the bag… even though it was blue, which was MY favorite color and hers is orange. 🤔 She had an idea of how she wanted it to look. Sure, why not?

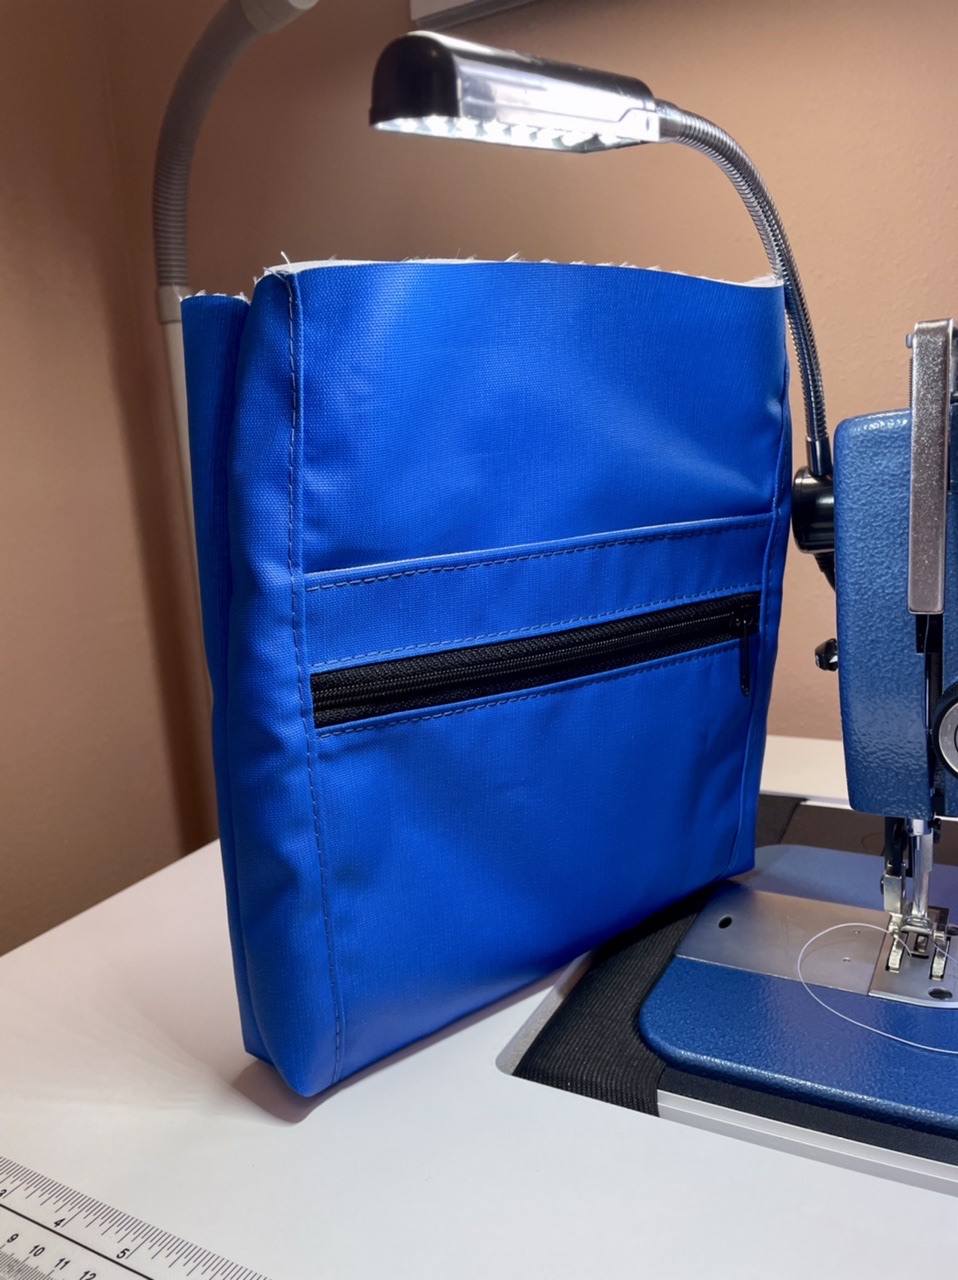
The fabric turned out to be some really tough water-proof stuff. It was a good choice for sewing on that new machine of mine. I just love the perfect stitches it produces!


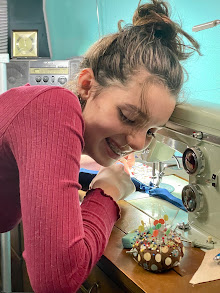
I kidded Jess that the fabric/zipper combo matched the machine so well that I could hardly see what I was doing. 🤣


Jess wanted this new bag to be two inches shorter, which was just a matter of shortening the rectangular pattern pieces - super easy. It came together so beautifully.


Just look at those perfect stitches!


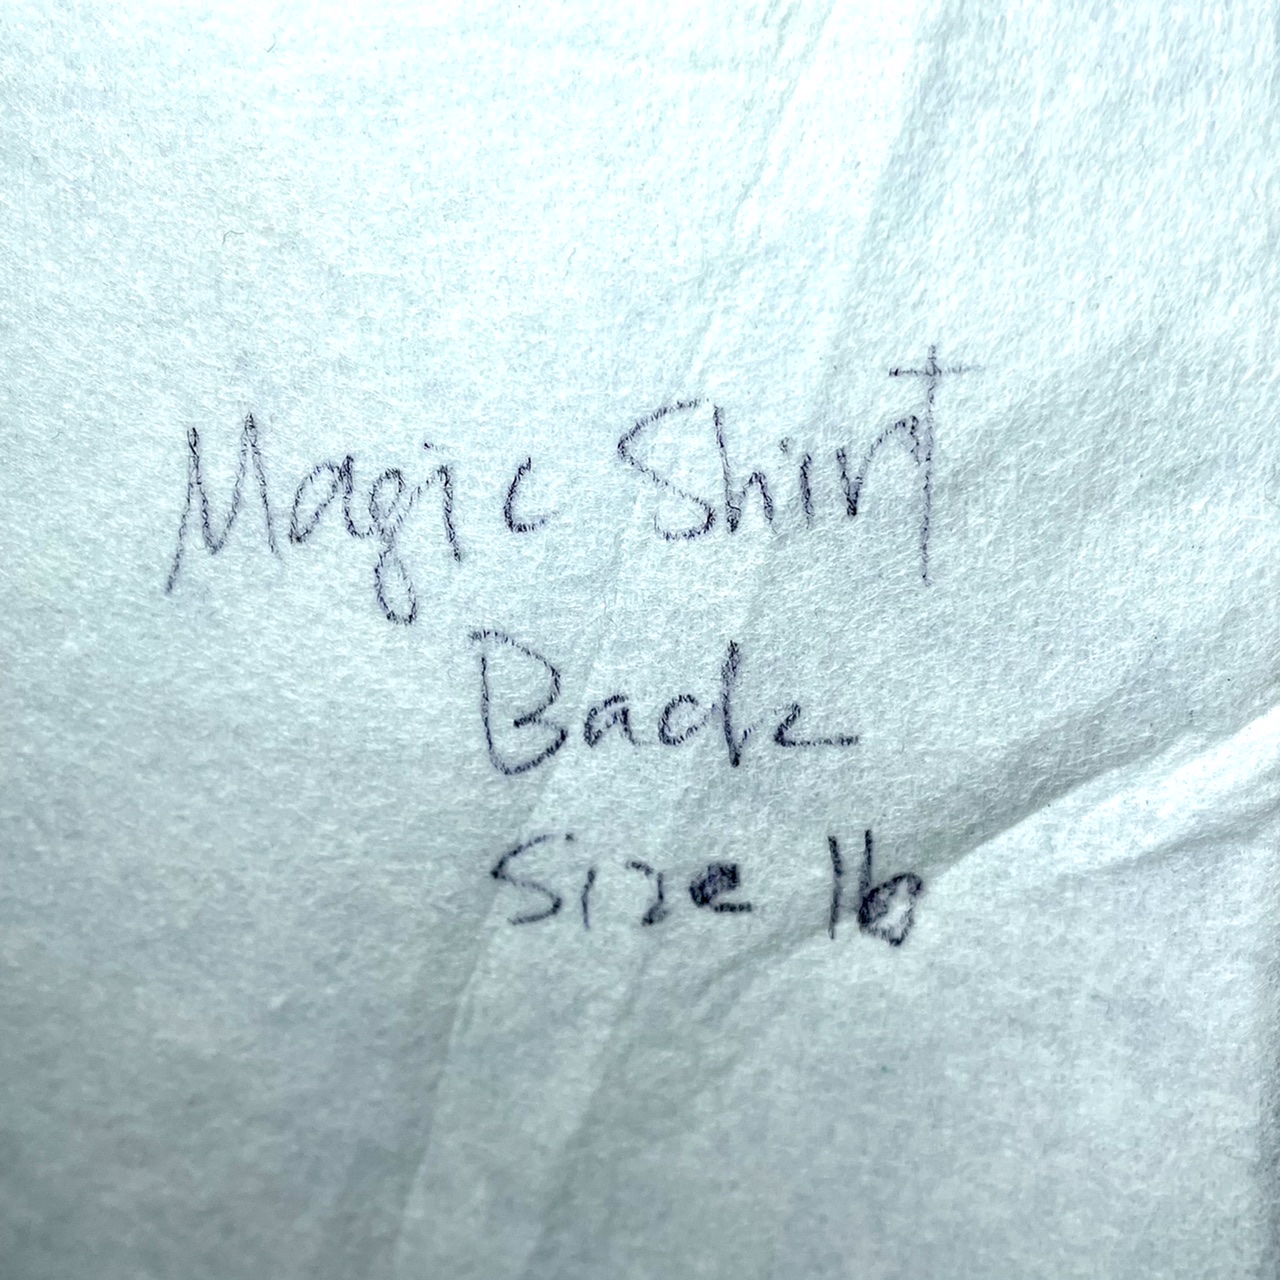
There’s a little secret tucked inside the bag. 🤫


Apparently the sew-in interfacing I used also makes good pattern pieces. Haha. I’d gotten it from Jess’s friend, Rachel, who owns a fabric store and was cleaning house and gifted me a bunch of fabrics and interfacings she had no more use for. I thought this would be appropriate for Jess’s bag. Here’s a closer look at what it says. It was just funny to my mind.


Jess had in mind a striped strap made of webbing, so she ordered this from an Etsy shop. It was designed by Tula Pink for Renaissance Ribbons. It saved me the trouble of making a strap for the bag. All I had to do was cut it and attach it.


Here’s the new Two Zip Hipster, shortened to be almost perfectly square.


I used silver waterproof canvas for the lining. With that and the sturdy outer fabric, no other interfacing was needed besides the sew-in. Also, the bag is so tough that it just might last Jess the rest of her life! Or MY life, anyway. 😅


Just more pretty stitching:


So that’s my second-to-last sewing finish. The last one is on its way to Jess right now along with this bag. I’ll give you a clue… it’s made from her new line of rayon fabric. I’ll post after she receives it and tries it on… and Alex finds time to take some photos. Three more projects are in the queue out of the same rayon (in different designs), so I’d better get busy! 

P.S. There’s still enough of that blue fabric left for something for myself, which I might also have in the works. 😉 And there’s still more left!

Thursday, September 22, 2022

Courtney’s Two Zip Hipster

You’ve maybe been holding your breath waiting to see Courtney’s 4-H project that I mentioned in my last post (well, maybe one of you, anyway - ha!). I’m sorry it’s taken so long, but I only got the final photos I wanted yesterday. But here we go…

She decided to sew a bag instead of a garment this year, which I was happy about, because a bag doesn’t have to ‘fit’, right? 😉 From experience, I knew that Dog Under My Desk patterns would be very doable for her because they’re explained so well and have actual photos instead of diagrams to show the process. She chose the Two Zip Hipster. I gave her a little guidance along the way, but she did all the work herself, from the cutting out, to the fusing interfacing…


… and of course all the sewing. Below she’s working on her very first zipper installation.


Now she believes me when I say that zippers are easy to sew in bags. Look at what a beautiful job she did!


Here she is modeling her finished Hipster:


Below is a closer look at some of the details. I love the fabrics and zippers she chose! And just look at that great stitching!


I’m not the only one who thought she did a fabulous job. She got the grand prize in that category at our local county fair, which qualified her to take it to the MN State Fair. She did so and won a blue ribbon there, which is awesome, considering how many entries there were!


Do you think I’m a proud grandma? Haha… you bet I am! I look forward to seeing her make another bag(s) in the future, which she says will definitely happen! Hurray! 💕💕

Friday, January 20, 2012

Two Zip Hipster Bag #2

Wow, it took me awhile to get back into sewing again after Christmas! I just couldn't seem to get in gear. But I finally got something accomplished... another Hipster bag. This one, unless plans change, is going to be used by Jess herself. (I believe the red one got gifted.)


Once again, the fabric is from Jess's Outside Oslo collection - "Sticks", from the Dusk colorway.

Like the zippers? I do!


I like the inside, too. So much so, that I had to take this pic before I finished putting it together.


Now that I'm back in the sewing mood, I hope to get a lot more done. I have a list..... stay tuned for more.

Linking up to amylouwho's sew & tell:


Monday, December 5, 2011

Two Zip Hipster Bag

Here's my latest project, completed! Yep, still baggin' it! It's called the Hipster bag, and the pattern is by Erin Erickson of "Dog Under My Desk". I loved making this bag, because everything came together perfectly. The pattern and instructions were so well-written that it made sewing it easy, plus it's such a cool bag. I like the zippered pocket and top a lot. And the strap is adjustable for wearing on your shoulder or across your chest like a messenger bag.


The outer fabric is by none other than Jessica Jones! The design is called Sticks, from the Dawn colorway of her Outside Oslo collection.


Both zippers went in very easily, because the instructions were terrific. There are three pockets... the zippered pocket plus a slip pocket behind it on the outside, and another pocket with a pen slot on the inside.


I used a different model for this 'size perspective' photo. I thought the bag would look nice with her outfit. She agreed to pose if I promised to cut off her head. ;)


I really need to quit taking pictures in a hurry, as well as at night. These aren't very good. For better photos and a more detailed pattern review, Jess will post when she receives the bag, which depends entirely on the Postal Service. (I mailed it on Saturday.) I'll update here when the time comes.


Update: The mail was a little slow and almost had me worried, but the bag did make it. Check out Jess's much-better-than-my photos and my pattern review. (And check out the comments she herself left if you want to see a photo of it 'on' her. ;) )


Linking up to Amylouwho's Sew & Tell:


Wednesday, May 29, 2019

Harbor Hipster

This post got delayed awhile, due to our crappy, ever-raining, dark, dreary, not-good-for-photos weather. I'd taken pics but wasn't at all happy with them, so finally got some re-takes. Actually, I did not take them myself. Jess and Alex came for the holiday weekend, and with them came two days of PERFECT(!) weather, so knowing Jess takes fabulous photos, I asked her to do them. I'm so glad I did - they turned out so much better than my previous ones. Plus, I may have learned a little something about getting nicer photos, too.

So here we have the Harbor Hipster, the newest pattern by Dog Under My Desk, which I was privileged to test. I love testing Erin's patterns. She always has such unique ways of doing things that are so helpful in making her bags come out looking great, and I always learn a tip or two in the process.


I know that Erin makes a bazillion prototypes herself before she sends her patterns to testers, so my job is never very hard to do, and I end up with another great bag! This one is just so cool - I love it! It's just the right size for a quick trip to town or going out for a walk. It even holds a water bottle if you happen to carry them. Because the back side is flat, it fits nicely against your body and is very comfortable to wear.

Through a lot of work, Erin managed to make this curved zipper front not only fit perfectly to give the bag some depth but easy to sew. VERY easy!


Inside there's a zippered pocket plus a divided slip pocket.


On the back, there's another zippered pocket, which gets sewn onto the bag very easily, even though it may look complicated. That Erin's a genius, I tell ya! 


That pocket is very easy to access and perfect for a phone of any size or whatever else you may want to put in it.


There's an adjustable crossbody strap so you can carry it across your body or just on your shoulder, however you prefer.


Here I am in my fancy pose (ha), giving you an idea of the size of this bag.


The pattern can be purchased here. I apologize for not getting this post done in time for you to take advantage of the discounted price, but Erin's patterns are definitely worth the full price and more, they are so good.

When I sewed this, I took a bit of a risk in using some heavier fabrics. The outer print is from Jess(a.k.a. How About Orange)'s  Holding Pattern line of barkcloth that she designed for Cloud9 Fabrics. The inner lining is from Jess's most recent design for Cloud9 - her Business Class rayon. I used a solid canvas for the straps and also the back and back pocket lining. The only place that got a little thick sewing was where the strap connectors are attached to the bag, but my good ol' 49-year-old Kenmore got the job done with no problem.

Did I have fun matching up that print on the outside? Let's just say that I like the challenge of fussy cutting, and this was definitely that! It nearly fried my brain, to tell you the truth. But I love how it turned out - even better than I'd hoped. Hurray!

Wednesday, June 21, 2023

Divi Boxy Pouch

I finished the most recent rayon project for Jess, and while I’m waiting for photos from her, I thought I’d sneak in a quick post about a different project I’d started before getting the rayon fabrics. I finally got to finish it yesterday during a pause between the last Jess project and the upcoming one.

I had somewhere come across the free tutorial for the Divi Boxy Pouch by My Handmade Space. I thought it looked pretty cool. Here is my version, made from the same fabrics as I used for Jess’s Two Zip Hipster. 


This gave me some more practice on my new sewing machine, and it was again learning experience. My first zipper ended up a bit wavy, but the second one was better.

The tutorial calls for double-pull zippers, but I only used one pull on each because I wanted to save the last two pulls I have for something else. It might not look as cool, but it’s still functional.


I made this for myself, and will likely use it for sewing tools or something. Here it is with a scissors for size comparison.


I found the instructions to be the bare minimum, so I suggest you be somewhat familiar with making boxed pouches before trying to make this. As it was, I wasn’t totally sure I was making it correctly. I just did what I thought the instructions meant. In the end, it all had to be turned right side out through one of the holes for the boxed corners in the lining. I was kind of doubtful that I was going to end up with a pouch that looked like it was supposed to! Here’s a quick video showing what it looked like before I “birthed” it. Note that little hole at the end that it all had to go through!


Since I’ve birthed bags made of stiff fabrics before, I knew I’d better warm this with a hair dryer to soften things up before attempting to turn it. Here are a couple of shots of the birthing in process:


It worked, as you can see from my first photos above! In fact, it wasn’t as hard to turn as I thought it was going to be. I was super delighted (and relieved!) to have it turn out like I’d imagined! Now that I know for sure how it’s supposed to work, I might even be tempted to make another one someday. But one more rayon project first…….

Wednesday, October 15, 2014

Time Warp Sunburst tote

If you recall this post from October 1st, you've probably been holding your breath waiting to see what I was going to make! Or, you've more likely forgotten all about it by now. Ha!

Well, here it is, all finished and modeled (for size comparison) by my favorite little model in all the world:


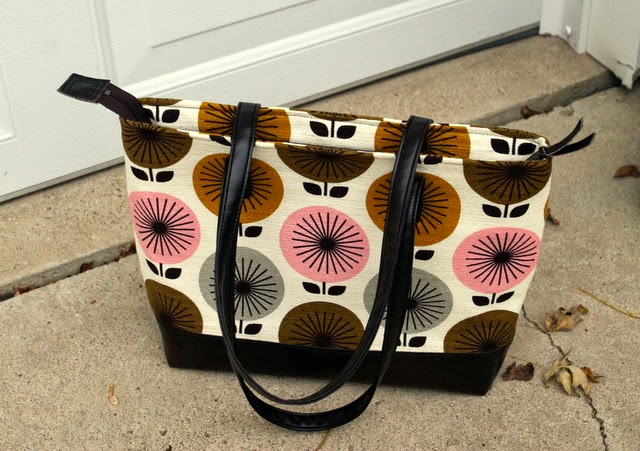
Obviously, it's a tote bag. It's made from "Sunburst" fabric, which is one of the designs in Jessica Jones's brand-new-not-even-out-yet Time Warp collection which she designed for Cloud9 Fabrics. The fabrics will be released for sale in November January (due to a damaged first shipment). Here are some more of the Time Warp designs:


They are printed on barkcloth, which I had never heard of before, but I found it to be very lovely fabric and easy to work with. I love it! It's heavier than a quilting cotton, but not quite as heavy as canvas, and it has a texture to it, which you can see above. Photos just never do it justice, though. It's so much prettier in person!

I didn't use a pattern for this tote. Jess and I decided what it should look like, and I figured out how to make it work. It's just a basic tote with a flat boxed bottom, so it was pretty simple to make. I just had to make sure I had all my calculations correct. It has a firm interfacing and stands up nicely on its own.


I did, however, use the instructions from Erin Erickson's Two Zip Hipster pattern for the recessed zipper, because I'd used it before a couple of times and knew it worked well.


The inside has a slip pocket on each side, one with a pen slot. The lining is a dark brown canvas, which makes it kind of hard for you to see, but the strip of Sunburst fabric at the top of each pocket helps.


The bottom of the tote is made from a dark brown faux leather, a.k.a. "pleather" (=plastic leather). It was my first time sewing with it, and I found it to be a piece of cake! I'd read all kinds of tips, etc., in preparation... like using a Teflon sewing machine foot, a leather needle, etc. This pleather was so lovely to sew on that none of that was really necessary. I found that my regular machine foot worked just fine, as did a regular size 14 needle.

I made the zipper tab from a scrap of the pleather...


... as well as the zipper pull. Fun little details.


A more complicated making, though, was the straps. It took a long time to decide how best to make them. I ended up using a tutorial from Emmaline Bags. I had to use a little math, too, to figure out how to splice them and not have the splice show, since the pleather wasn't long enough to cut the whole length needed. The tutorial was great, and I'm pretty pleased with how the straps turned out. (They're really not as dark as they appear in this photo.) I did use the leather needle when sewing these, just to make sure I wouldn't have any trouble sewing through the multiple layers. It went very smoothly.


My only real struggle of the whole project was setting the rivets. I think the problem was that the rivets we'd gotten were just too long, and pounding them enough to get them tight made them go crooked. Or something. But, I did manage to get them in decently finally. (And I learned that you CAN remove rivets if you have to! Not easy, but do-able.)


All in all, I very pleased with how the bag turned out. Jess will be taking it with her to the International Quilt Market in Houston, TX, the end of this month, so she can carry it around and tell everybody "Look at my new fabric!" Ha.

Our little photo shoot was fun on Monday afternoon. We even had inspectors, one whose colors went very nicely with the bag.


Here's the second inspector. She didn't match as well, and she was a bit more shy so she inspected from a distance. Shy but beautiful.


I do love my little model! She's the greatest! And works cheap. :)


She really got into the modeling thing. Here are some more of her fun poses. If you're in the market to hire her professionally (or just want to see), you can click on the image below for a better look at her poses. :)