Friday, September 21, 2018

Tiny Cowboy Boots

Some months ago - April, actually - Jess showed me a super cute pattern of various tiny baby shoes that could be made from fabric. Her exact words were: "Look at the baby cowboy boots! I wish I liked sewing more or I'd make some for Megumi's baby. A gift from America. :)" Not a hint or anything. Nooooo. Ha.

My response was: "They are adorable! I know someone who does like to sew... little putzy things like that, even!"

So that's how I ended up making very tiny cowboy boots. And here they are!


It's a good thing I do like making putzy little things, because they certainly were that! First there was all the topstitching. It took some time and practicing so that all those stars would have a uniform shape and even stitch lengths to each point. But once I got one figured out, they went pretty smoothly. This was on a layer of chambray plus Pellon fusible foam.


Since I had no topstitching thread or local source to buy some, and I wanted things to show up better than with just a single strand of regular thread, I experimented with using two threads in my needle along with one in the bobbin. I thought I had read that somewhere... or maybe I made it up... I don't really remember. But the important thing is that it worked! Yay! Below are the tabs. The second from the left shows the single bobbin thread, and the other three are the double-thread topstitch.


The next challenge was sewing that toe piece onto the top. It doesn't look too bad just pinned there, right?


These are the shapes that had to be joined, though!


I used lots of Wonder Clips trying to hold that fleece down, because it really wasn't supposed to show.


But show it did... and actually I liked it better this way!


Using the fleece was what caused the biggest challenge. The pattern didn't require it, but let's go for the cuteness factor, right? It was thick and a bit stretchy, and of course it covered up the stitches and the fabric edges, so I was somewhat sewing blind. Ha!


That skinny little bottom band was tricky enough to sew on, not to mention with fleece...


... and I'd never have accomplished them without more Wonder Clips!


But I did it, with only minor puckers. Then came the soles...


... which nearly made me lose my sanity! ;)

The pattern called for cotton fabric for the bottom lining, but that didn't seem like it'd be as comfy, so I used fleece throughout. And don't they look cozy when all was said and done?!


Yes, very tiny.


My favorite photo assistant gives you another size perspective.


Before I made these, Jess and I talked of how cute they'd be in pleather. These were actually supposed to be just a prototype, but it's a good thing they were a wearable prototype, because there's no way I'd do them again in pleather! Hahahaha! Or maybe even with fabric. For sure not with the fleece. 'Maybe' with fleece fabric. Maybe not. But Megumi, if you ever read this, know that they were a labor of love! And your little guy is just about the cutest baby I've ever seen! When he grows into them, if you feel like sending me a photo I can post of him wearing them, I'd be delighted! But it's not required. ;)

The pattern I used was an Ellie Mae Designs (#K113) by the McCall Pattern Company. I may have since made another of the tiny shoes from the pattern. I'm still sane. Barely! ;) But they were fun, and soooo cute, too! You'll see them later. They haven't been gifted yet.

Thursday, September 13, 2018

Zip Around Town Wallet

Once again I was privileged to test a new Dog Under My Desk pattern. Once again the hardest part was choosing the best fabric/zipper combination. :) I don't have a lot of half-yard cuts of lining fabrics, which this pattern called for. I just couldn't find a combo I liked... until I came across these. The fabrics are leftovers from an Arm Candy bag I sewed for Cloud9 Fabrics. If I remember correctly, they're not even the actual fabrics but digitally printed samples. But they worked! And they are so pretty (designed by Elizabeth Olwen)! (Note: I ended up swapping out the solid green for a khaki, due to not having a reasonable thread match and no local source to buy any.)


The zipper was from another pattern test... one I kind of botched up (long story)... so if you notice the uneven end on it in the photo above, that's why. But it did the job and matched perfectly. The ends were cut off, anyway, so the unevenness didn't matter. Here's what it looked like after sewing to the outer part of the project. It wasn't as challenging as it may look, thanks to Erin's well-thought-out instructions and tips.


Here we have the completed Zip Around Town Wallet!


The inside has six card slots, a zippered pocket with space behind it that fits a phone or passport, and an optional clear vinyl ID pocket.


This is what it looks like semi-loaded up.


Someone in the Facebook group asked for a size comparison to the Spring Fling bag, so here's that shot I took for reference for you (even though the color combination of the two kinda makes me want to cringe!).


The Zip Around Town Wallet was released for sale today! It's even on sale at a $2 discount if you purchase it by Tuesday, September 18th. As is always the case with DUMD patterns, it's fabulous! Erin made lots of prototypes, each with changes from the previous, so that she got it 'just right'. Her instructions are very clear and easy to follow, and the photos illustrating the steps are very helpful. It's another winner for sure!

Friday, August 31, 2018

Triple Zip Pouch #8 and more

I've been scrapbusting again! I wanted to make a gift for a special friend who is retiring as of today. This friend has also been my hairdresser for somewhere around 25 years!! That's a heckuva lot of haircuts (and maybe a few perms back in the day)!! Today was my last one from her, sadly. In fact, I was her very last client.

She has always been interested in Jess's fabrics, so of course a gift made out of some of them was in order. I went to one of my favorite tutorials, the Triple Zip Pouch by Debbie Jeske (you can see some others that I've made here), and I chose Jess's Typography fabrics. So here you have it! Rather a fun combination, right?


It was so fun, in fact, that I decided to add something else... an Earbud Pouch by Erin (Erickson) Gilbey.


Then I thought about the cord wraps that are so quick and easy to make, so I decided to make one of those, too. I couldn't decide whether to make it reversible or not, so I made one of each! Ha!


I rounded the ends on the reversible one so that it wouldn't matter which way it was snapped... there would always be the round end on the outside, where with the other, if you reversed it, you'd end up with a squared-off end on the outside. Nothing terrible, really, but I like the rounded look better.


Then I quit. Here you have the whole set. She loved it. There may have been a few tears involved.


Love ya, Lori! We'll do that lunch someday and catch up on our cat stories again!

Thursday, August 9, 2018

Sewing with Courtney - 4-H project

Hold onto your hats, folks... here I am with the second blog post in a week! I know - shocking, right?!

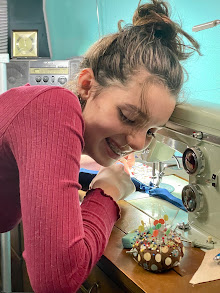
The 4-H Fashion Revue suddenly came around Tuesday night, and now I'm free to post the photos of Courtney's garment construction project! So let's get to it... here she is, cutting out a maxi dress! I even let her use my Martelli rotary cutter, which she definitely favored over the other ones I have (as do I).


She did all the cutting and all the sewing herself. I only gave some guidance, particularly with the pattern instructions.


She made faces at me occasionally as I was taking the requisite project photos. This is the only one I figured I could get away with posting. Ha!


There was some hand sewing in a couple of small spots. She's really good with the ladder stitch, since she's used it on other projects, too.


Probably the trickiest part to sew was the casing for the waist elastic, since it was inside the dress after the side and back seams were sewn. She took lots of care to make sure she didn't get any extra unseen fabric from underneath into her seams.


This is the pattern she used. It was a great one for sewing a first dress.


Here is her version. 


The fabric she'd chosen was a modal rayon, which was nice and flowy.


We had another windy day for our photo shoot, which was a bit frustrating, but I think it actually helped to show the flowiness of the fabric.


I should've had her lift her hair so you could see the drawstring that gathers the top and ties in the back. Oh, well... just imagine a bow under there. :)

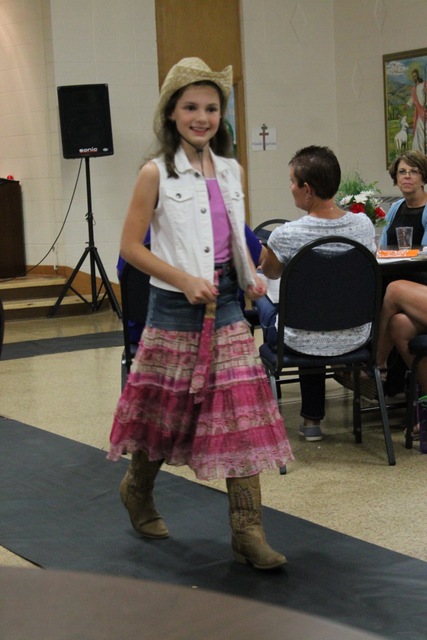
She paired it with a white vest for the Fashion Revue, and here she is modeling it. She took top honors for her construction!


Also for the Fashion Revue, she modeled a purchased dress. I think this outfit is just so adorable on her!


Her last outfit was a "recycled" one that she put together. It also got top honors. So cute, huh?


That's it for the Fashion Revue, although she did play piano in between the modeling, but I could barely see her, so I have no photo of that. Courtney has lots of other projects for the County Fair, both for 4-H and open class, but I didn't help with those and don't have any photos. The dress-making kept us busy enough this year. :)

Monday, August 6, 2018

Gadget Guard #4

I bought something for myself a couple weeks ago. I don't use my PC much anymore, instead doing almost everything (except blog posts, which unfortunately I can't do) from my iPad. When it comes to lengthy emails or something requiring a fair amount of typing, I get tired of the ol' two-finger method, and I finally decided to check into getting a keyboard to use with the iPad. I found a nice one on Amazon, battery-operated and with Bluetooth. It didn't cost as much as I expected. Here it is.


I love it, and it works great! I don't use it all the time... just for the lots-of-typing stuff... but when I do, I find it very helpful.

I'd been meaning to make a new Gadget Guard for my iPad anyway, because the only one I have that really fits it is this one, which is useful for around here, but it's not very classy, y'know? So I decided to make one that would fit the iPad and keyboard together, and I used this barkcloth designed by Jess awhile back. By the way, this is the front pocket, after I'd pleated it. Can you see the pleat?


Yes, there's a pleat in there, although it's slightly off-center. It's also somewhat narrower than what the pattern calls for, in order to make the design line up, but that's fine, as the iPad charger is small and doesn't take up much room. It took some thinking about how to get everything to line up right... it kinda twists my brain every time I get to fussy cutting something like that, but it worked! Here's my new Gadget Guard, completed.


I love that the pattern is customizable for any size gadget. See what a nice snug fit it provides?


Since the keyboard is only ¼" thick, the iPad still fits nicely by itself, too. Of course the Gadget Guard is padded with foam (Soft and Stable, in this case) to provide protection.

Here's a closeup of the barkcloth. I just love its texture!


The Gadget Guard pattern is by Dog Under My Desk. As always, I highly recommend Erin's patterns. They are absolutely the BEST! I've tested a lot of them, and I know how much work she puts into them and how she does her best to make sure her customers (even inexperienced sewers) end up with terrific looking bags! Incidentally, she's working on a new pattern for a zip-around wallet that looks pretty fantastic! It'll be ready for testers very soon (this week?) and available for purchase hopefully before the end of the month. Watch for it!

Now just for fun, here's my photography assistant, a.k.a. my bestest photobomber! If you follow my Instagram account (grandma_g415), you've seen plenty of pics and videos of her.


She's 9 weeks old, beautiful, crazy-fun, and I love her to pieces. And she currently lives in the garage... even though I swore I'd never have cats/kittens in the garage again. Ha! Long story. ;)